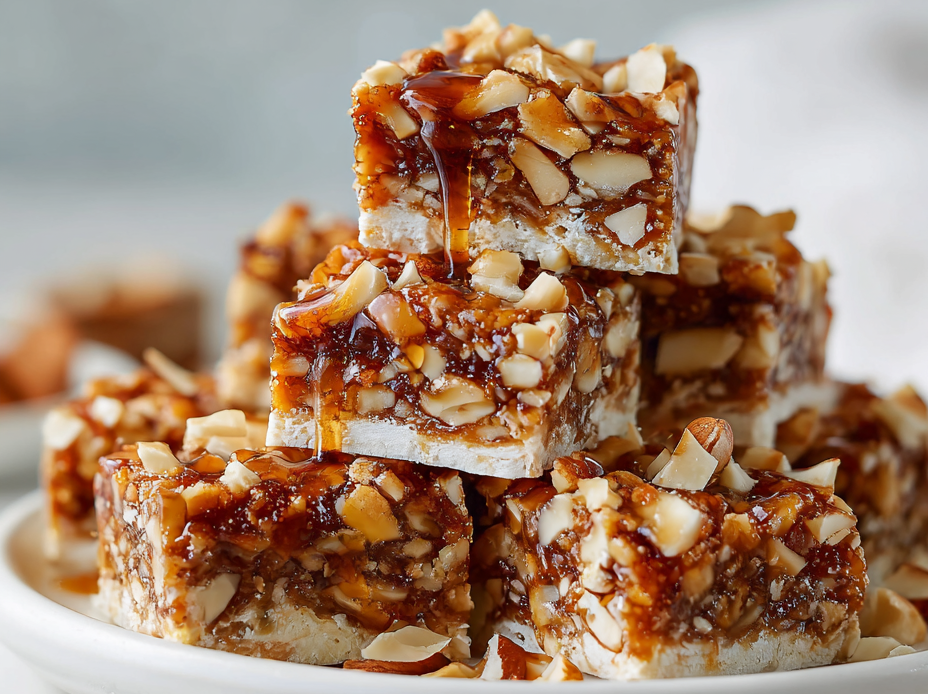
Sometimes, the simplest recipes are the most satisfying. No bake date bars are my go-to when I need a quick, wholesome treat that doesn’t demand turning on the oven. The natural caramel-like sweetness of dates, combined with toasted nuts and a touch of sea salt, creates a bite that’s both rich and surprisingly fresh.
I love how these bars come together with just a handful of ingredients, yet deliver a flavor punch that feels indulgent without feeling heavy. They’re perfect for busy mornings, afternoon snack attacks, or a little something sweet after dinner—without any fuss or extra clean-up. It’s all about enjoying something homemade and honest, in a way that’s almost effortless.
This recipe is inspired by the idea of creating a nostalgic, homemade treat that feels both indulgent and accessible, especially on busy days when turning on the oven isn’t an option. I love how the natural sweetness of dates pairs with crunchy nuts and a hint of sea salt, making each bite feel like a little burst of comfort. It’s about embracing simplicity while still feeling like you’re indulging in something special, no baking required.
The story behind this recipe
- This recipe took shape from a lazy afternoon craving for something sweet but honest. I remember rummaging through my pantry, finding a stash of dates and thinking how they could turn into a sticky, satisfying treat without any baking fuss. It’s the kind of thing I make when I want a quick, wholesome pick-me-up that feels like a little secret between me and my kitchen.
- The idea of no bake bars came from my tendency to overcomplicate desserts—sometimes, simplicity is king. I love how the dates provide natural caramel richness, while the nuts add crunch and depth. It’s a recipe inspired by those moments when I want something homemade, comforting, and just a bit indulgent, all without turning on the oven.
- heading: ‘The story behind this recipe’
Key ingredients and their role
- Dates: I love how their sticky, caramel-like sweetness brings everything together. Make sure they’re soft enough to blend easily, or soak them in warm water for a few minutes if they’re too firm.
- Nuts: I prefer toasted almonds or walnuts—they add a lovely crunch and nutty aroma. Feel free to swap with pecans or cashews, but toast them lightly to boost flavor.
- Oats: Old-fashioned rolled oats give the bars a chewy texture. If you want a firmer bite, use quick oats; for more chew, keep it to the regular rolled oats.
- Salt: Just a pinch of sea salt makes the sweetness pop. Don’t skip it, but if you’re reducing sodium, a tiny bit less works fine—just don’t omit it entirely.
- Vanilla extract: A splash of vanilla brightens everything up, adding a subtle warmth. Skip it if you want a more straightforward date flavor, or swap with a hint of cinnamon for extra depth.
- Coconut oil: A small amount helps everything stick together and adds a faint sheen. Use a neutral oil or a touch of honey if you prefer a different binding agent, but don’t skip the fat—it’s key for texture.
- Chocolate (optional): I love drizzling dark chocolate on top after they set. For a dairy-free version, use coconut or almond bark—you’ll still get that satisfying melt and richness.
Spotlight on key ingredients
Dates:
- Their sticky, caramel-like sweetness is what makes these bars irresistible. Make sure they’re soft enough to blend easily, or soak them briefly in warm water if needed.
- Nuts: Toasted almonds or walnuts add a crunchy, nutty aroma that balances the softness of dates. Feel free to swap with pecans or cashews, but toast lightly to enhance flavor.
Nuts:
- Dates: Their sticky, caramel-like sweetness is what makes these bars irresistible. Make sure they’re soft enough to blend easily, or soak them briefly in warm water if needed.
- Toasted almonds or walnuts add a crunchy, nutty aroma that balances the softness of dates. Feel free to swap with pecans or cashews, but toast lightly to enhance flavor.
Notes for ingredient swaps
- Dairy-Free: Swap butter with coconut oil or vegan margarine. Keep in mind, it may alter the richness slightly.
- Nut-Free: Use sunflower seeds or pumpkin seeds instead of nuts. They add crunch but a different flavor profile.
- Sweetener: Replace dates with dried figs or apricots for a different fruity sweetness. Watch for extra moisture.
- Texture Booster: Incorporate a handful of shredded coconut or puffed rice for added crunch and texture variation.
- Flavor Kick: Add a pinch of cinnamon, cardamom, or chili powder for a spicy or smoky twist.
- Chocolate: Use dairy-free dark chocolate or carob chips for a different melt and flavor, especially if going vegan.
- Binder: If you’re out of dates, try mashed banana or honey, but expect a softer, less sticky bar.
Equipment & Tools
- Food processor: To blend dates and nuts into sticky mixture.
- 20cm (8-inch) square pan: To set and shape the bars.
- Parchment paper: For easy removal and clean edges.
- Spatula: To press and smooth the mixture.
- Knife: To slice the set bars.
Step-by-step guide to no bake date bars
- Gather your equipment: a food processor for blending, a 20cm (8-inch) square pan for setting, and a spatula for pressing. Have parchment paper ready for easy removal.
- Pit the dates if they have pits. Measure out about 200g (7 oz) of dates, roughly chopped for easier blending.
- Toast your nuts lightly in a dry skillet over medium heat for 3–4 minutes until fragrant and slightly golden. Let cool slightly.
- In the food processor, combine the dates and toasted nuts. Pulse until the mixture becomes sticky and crumbly, but holds together when pressed. This should take about 30 seconds to 1 minute.
- If the mixture feels too dry or crumbly, add a teaspoon of melted coconut oil or a splash of warm water and pulse again. It should be sticky enough to press into your pan without cracking.
- Line your pan with parchment paper, leaving overhang for easy lifting. Transfer the date-nut mixture into the pan.
- Press the mixture firmly with the back of a spatula or your hands to evenly spread and compact it. Aim for a smooth, even layer.
- Chill the bars in the fridge for at least 2 hours, or until firm. If in a hurry, freeze for 45 minutes, checking for a firm but not frozen texture.
- Once set, lift the slab out of the pan using the parchment overhang. Slice into bars or squares with a sharp knife.
- Optional: Melt dark chocolate and drizzle over the bars. Let the chocolate set at room temperature or in the fridge for about 20 minutes.
- Finish by storing in an airtight container in the fridge for up to a week, or freeze for longer storage. Serve straight from the fridge for best chewiness and flavor.
Chill the bars until firm, then cut into squares. Drizzle with melted chocolate if desired. Store in an airtight container in the fridge, and serve chilled or at room temperature.
How to Know It’s Done
- Mixture should be sticky enough to hold together when pressed.
- Bars are firm and hold their shape after chilling.
- Chocolate (if added) is glossy and set without melting when touched.

No Bake Date Bars
Ingredients
Equipment
Method
- Begin by pitting the dates if they have pits, then roughly chop them for easier blending.
- Lightly toast the almonds in a dry skillet over medium heat for about 3-4 minutes until fragrant and golden, then let them cool slightly.
- Place the dates and toasted almonds into your food processor and pulse until the mixture becomes sticky, crumbly, and begins to hold together when pressed—about 30 seconds to a minute.
- Add the rolled oats, a pinch of sea salt, vanilla extract, and melted coconut oil to the processor. Pulse again until everything is evenly combined and the mixture is sticky and cohesive.
- Line your square pan with parchment paper, leaving some overhang for easy removal. Transfer the mixture into the pan.
- Press the mixture firmly into the pan using the back of a spatula or your fingers, ensuring an even, compact layer that feels firm and smooth on top.
- Place the pan in the fridge and chill for at least 2 hours, or in the freezer for about 45 minutes, until the bars are firm and set.
- Once chilled, lift the slab out of the pan using the parchment overhang and slice into 12 even squares or bars.
- If desired, melt some dark chocolate and drizzle over the bars for an extra touch of indulgence. Let the chocolate set for about 20 minutes before serving.
- Enjoy the bars straight from the fridge for a chewy, satisfying treat. Store any leftovers in an airtight container in the fridge for up to a week, or freeze for longer storage.
Notes
Pro tips for perfect no bake bars
- Use slightly warm dates for easier blending, they become gooey and sticky, making the mixture smoother.
- Toast nuts until fragrant and golden—this intensifies their aroma and adds a crispy texture to your bars.
- When pressing mixture into the pan, use the back of a spatula or the bottom of a glass to get an even, compact layer.
- Chill the bars in the fridge for at least 2 hours, or freeze for 45 minutes, until they’re firm and easy to cut cleanly.
- If the mixture feels too crumbly, stir in a teaspoon of melted coconut oil or a splash of warm water to help it stick together.
- When melting chocolate for drizzling, do it in short bursts at low heat, stirring often to prevent scorching and achieve a glossy finish.
- For a more intense date flavor, soak the pitted dates in warm water for 10 minutes before blending—extra soft and caramel-rich.
Common mistakes and how to fix them
- FORGOT to evenly press mixture → press firmly and evenly for consistent bars.
- DUMPED mixture too hot → let it cool slightly before pressing to prevent melting the pan.
- OVER-TORCHED chocolate → melt at low heat and stir frequently to avoid burning.
- MISSED chilling time → ensure bars are fully chilled for proper firmness and clean cuts.
Quick fixes and pantry swaps
- If mixture feels too dry, splash in warm water and pulse again to revive stickiness.
- When bars crack during slicing, briefly warm the knife or chill bars further.
- Dumped chocolate too thick? Splash with a tiny bit of coconut oil and stir until smooth.
- When mixture sticks to hands, wet fingers slightly to press easily without sticking.
- Splash a few drops of warm water if the dates are too firm to blend smoothly.
Prep, store, and reheat tips
- Prepare the date and nut mixture in advance; it can be stored in an airtight container in the fridge for up to 3 days, maintaining its sticky, fragrant aroma.
- Bars can be wrapped tightly and kept in the fridge for up to a week; the chilled texture enhances chewiness and flavor depth.
- For longer storage, freeze the bars in an airtight container for up to 1 month. Thaw in the fridge for a few hours before serving to preserve texture.
- Reheat refrigerated bars briefly at room temperature for softer bites, or enjoy straight from the fridge for a firmer, more refreshing experience. The flavors intensify slightly after chilling.
Top questions about no bake date bars
1. Can I use dried dates that are hard?
Use soft, pitted dates for easiest blending. If they’re firm, soak in warm water for 10 minutes.
2. Should I toast the nuts first?
Toast your nuts lightly until fragrant and golden, about 3-4 minutes in a dry skillet, to boost flavor and crunch.
3. Can I replace dates with something else?
Yes, you can swap honey or mashed banana for dates, but expect a softer, less sticky bar and adjust the binding accordingly.
4. How long should I chill the bars?
Chill the bars until firm, at least 2 hours, to make slicing easier and ensure they hold their shape.
5. Can I add chocolate on top?
Drizzle melted dark chocolate over the bars after they set, then refrigerate for 20 minutes until the chocolate hardens.
6. My mixture is too dry, what do I do?
If the mixture feels too crumbly, stir in a teaspoon of melted coconut oil or a splash of warm water to help it stick together.
7. How should I store the bars?
Store the bars in an airtight container in the fridge for up to a week or freeze for longer storage, up to a month.
8. How do I reheat the bars?
Reheat in the microwave for 10-15 seconds for a softer bite, or enjoy cold for chewier texture and more intense flavor.
9. How can I cut the bars cleanly?
Use a sharp knife warmed slightly with hot water to get clean slices without cracking the bars.
10. The bars are cracking when I slice, what do I do?
If your bars crack during slicing, briefly chill them further or warm the knife for smoother cuts.
These no bake date bars are a quiet reminder that simple ingredients can create something deeply satisfying. When the weather turns cooler, I find myself craving the chewy, caramel richness they offer, especially with a cup of tea. They feel like a small, honest act of kindness in my busy days.
Sharing them with friends or keeping a stash in the fridge makes moments sweeter—no fuss, just a little homemade comfort. It’s one of those recipes that sneaks into regular rotation because it’s so easy and reliably delicious. Sometimes, that’s enough to make the day feel a bit more manageable.

Hi, I’m Madison Lane, the cook, recipe creator, and heart behind this kitchen. Food has been part of my life for as long as I can remember. Some of my earliest memories are of standing beside my dad while he cooked, watching him move comfortably around the kitchen, tasting sauces, and explaining why patience mattered just as much as seasoning.
