Sometimes, I find myself craving a sweet bite that’s quick to make and doesn’t require turning on the oven. These no-bake coconut bars hit that spot, especially on busy afternoons when I want something satisfying without the fuss. They remind me of those childhood treats, but I’ve tweaked the ingredients to keep things a little lighter and more honest to what I keep in my pantry.
What I love most is how adaptable this recipe is—no fancy equipment needed, just a bowl and a bit of patience. Plus, the coconut aroma whenever I press them into the pan is pure sunshine. These bars are the kind of thing I stash in the freezer for a quick snack, and they somehow taste even better after a little chill.
This recipe is inspired by the nostalgic simplicity of childhood treats, but with a modern, health-conscious twist that makes it feel indulgent yet better for you.
The story behind this recipe
- This recipe came from a lazy afternoon craving something sweet and coconutty, but I didn’t want to turn on the oven or mess with complicated ingredients. One day, I threw together what I had—coconut, honey, a bit of butter—and ended up with these unexpectedly addictive bars. Now, they’re my go-to when I need a quick fix that feels like a treat but isn’t a hassle.
- I love how they remind me of childhood snacks, but with a grown-up twist—less sugar, more texture. The moment I press the mixture into the pan, the coconut aroma fills the whole kitchen and sparks a little nostalgic smile. They’ve become my secret weapon for last-minute gatherings or just a quiet moment with a coffee.
- heading
- story_type
Ingredient breakdown: key components
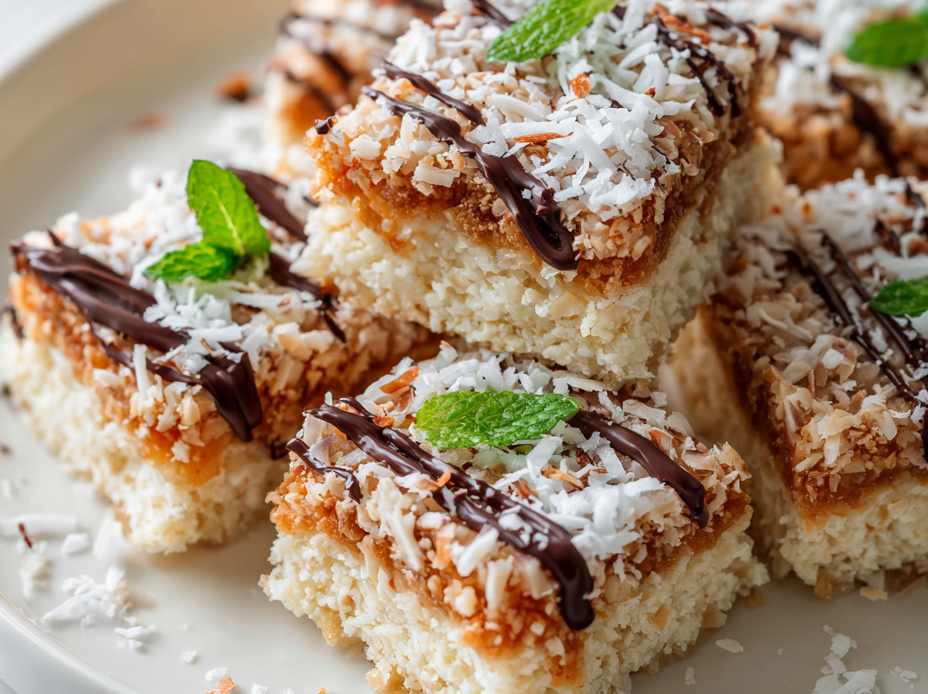
- Coconut flakes: I prefer toasted for that rich, nutty aroma that makes the bars smell like a tropical dream. Skip if you’re avoiding texture crunch.
- Honey: My go-to for natural sweetness, it brings a sticky, glossy quality that helps everything hold together. Use maple syrup for a milder flavor, but it won’t be quite as sticky.
- Butter: I use unsalted to control the saltiness, and it gives the mixture a smooth, velvety feel. For a dairy-free version, coconut oil works but adds a slightly different richness.
- Vanilla extract: Just a splash deepens the coconut flavor and adds a warm undertone. Skip if you want pure coconut, but it’s worth that tiny extra step.
- Salt: A pinch enhances the sweetness and rounds out the flavors. Too much can make it salty—be sparing, especially if your honey is already salty.
- Optional add-ins: Chopped nuts or dried fruits — I love adding a handful of macadamias for crunch, but keep in mind they’ll change the texture and flavor profile.
- Pan and liner: I use a 9-inch square pan lined with parchment for easy removal. Greasing it lightly helps prevent sticking, especially if your mixture is extra sticky.
Spotlight on key ingredients
Coconut flakes:
- I prefer toasted for that rich, nutty aroma that makes the bars smell like a tropical dream. Skip if you’re avoiding texture crunch.
- Honey: My go-to for natural sweetness, it brings a sticky, glossy quality that helps everything hold together. Use maple syrup for a milder flavor, but it won’t be quite as sticky.
- Butter: I use unsalted to control the saltiness, and it gives the mixture a smooth, velvety feel. For a dairy-free version, coconut oil works but adds a slightly different richness.
Honey and Butter:
- Honey: I love how it adds a deep, floral sweetness and that slightly chewy texture. If you want less sticky, try agave syrup, but expect a smoother bite.
- Butter: It melts into the mixture, giving that rich, velvety chew. For vegan, coconut oil will do, but watch for different melting points and flavor.
Notes for ingredient swaps
- Dairy-Free: Swap butter for coconut oil or a neutral-flavored vegetable oil. Keeps the fat content but changes the richness slightly.
- Sweeteners: Use maple syrup or agave nectar instead of honey for a different sweetness profile. Expect a milder, more floral note.
- Coconut: Try shredded unsweetened dried mango or pineapple for a tropical twist. Adds chewy texture and fruity aroma.
- Binders: Medjool dates blended into the mixture can replace honey for a more natural, caramel-like sweetness and added fiber.
- Add-ins: Nuts like macadamias or almonds can be swapped out for dried fruits or chocolate chips, altering crunch and flavor.
- Flavor Boost: A splash of almond extract or coconut essence can intensify coconut flavor or add a nutty undertone if desired.
- Pan Options: Use a silicone mold or a different-sized pan for varying bar thickness and presentation styles.
Equipment & Tools
- Mixing bowl: Combine ingredients thoroughly.
- Spatula: Spread and press the mixture evenly.
- 9-inch square pan: Shape and set the bars.
- Parchment paper: Prevent sticking and facilitate removal.
- Sharp knife: Cut into bars cleanly.
Step-by-step guide to no bake coconut bars
- Gather your equipment: a mixing bowl, a spatula, a 9-inch square pan, and parchment paper. Line the pan with parchment for easy removal.
- In the mixing bowl, combine 2 cups of shredded coconut flakes, ½ cup honey, ¼ cup melted unsalted butter, and 1 teaspoon vanilla extract. Mix well until the mixture is sticky and cohesive.
- Press the mixture firmly into the prepared pan, spreading evenly with the spatula. Use the back of a spoon to smooth the surface and ensure it’s compact.
- Place the pan in the fridge for about 2 hours. This allows the bars to set and the flavors to meld. The mixture should feel firm and hold together when pressed.
- Once chilled and firm, lift out the block using the parchment edges. Cut into 12 equal squares with a sharp knife. If the mixture sticks, briefly dip the knife in warm water.
- Optional: For a toasted coconut flavor, sprinkle a little extra coconut on top before chilling or lightly toast the coconut flakes before mixing.
- Serve directly from the fridge for best texture. Keep leftovers in an airtight container, refrigerated for up to a week or frozen for longer storage.
Chill the assembled bars in the fridge for at least 2 hours until firm. Slice into squares, then serve or store in an airtight container. Keep refrigerated for freshness, and enjoy within a week for optimal texture and flavor.
How to Know It’s Done
- The mixture is sticky and holds together when pressed.
- The pressed mixture is smooth and evenly distributed in the pan.
- Bars feel firm and set when tested after refrigeration.
No-Bake Coconut Bars
Ingredients
Equipment
Method
- Line your 9-inch square pan with parchment paper, leaving some overhang for easy removal.
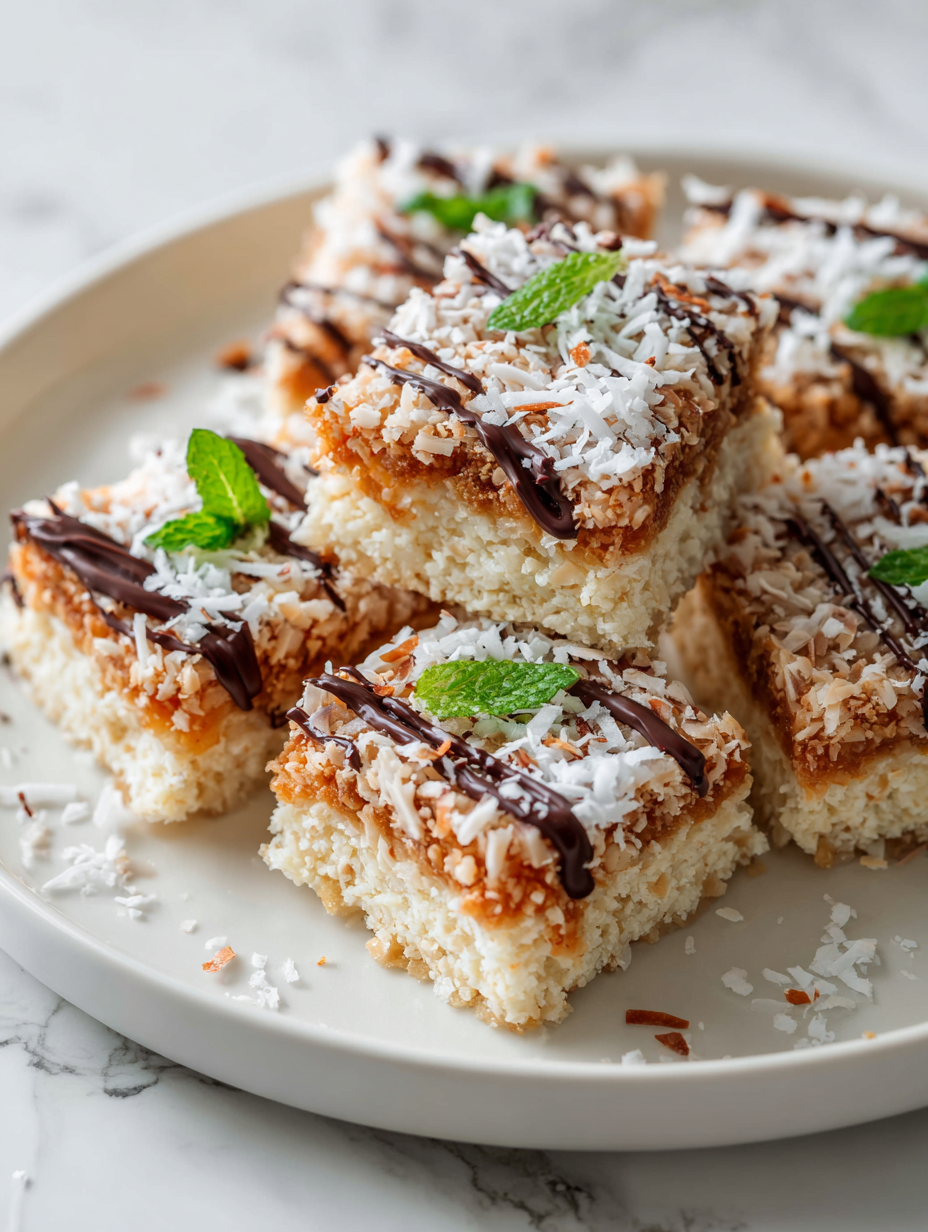
- In a large mixing bowl, combine the toasted shredded coconut flakes with honey, melted butter, and vanilla extract. Use a spatula to mix everything thoroughly until the mixture becomes sticky and cohesive, and the coconut is evenly coated.
- Press the mixture firmly into the prepared pan, spreading it evenly with the spatula and pressing down to ensure it’s compact. This helps the bars hold together nicely once set.
- Place the pan in the fridge and chill for about 2 hours, or until the mixture feels firm and holds together when pressed.
- Once chilled, lift the set mixture out of the pan using the parchment overhang. Place on a cutting board and cut into 12 even squares with a sharp knife. Dipping the knife in warm water between cuts helps make clean slices.
- Serve the coconut bars directly from the fridge for a chewy, firm texture. Store leftovers in an airtight container in the fridge for up to a week or freeze for longer storage.
Pro tips for perfect coconut bars
- Bolded mini-head: Use a silicone spatula → It folds the sticky mixture smoothly without tearing.
- Bolded mini-head: Chill the mixture briefly before pressing → Helps it firm up, making pressing easier.
- Bolded mini-head: Press firmly and evenly → Avoid air pockets, ensure consistent thickness.
- Bolded mini-head: Use a warm knife to cut → Dips in warm water make cleaner, less jagged edges.
- Bolded mini-head: Toast coconut until golden → Unlocks a deeper, toasted aroma that boosts flavor.
- Bolded mini-head: Add a pinch of sea salt → Enhances sweetness and rounds out coconut flavor.
- Bolded mini-head: Store in an airtight container → Keeps bars fresh and prevents them from drying out.
Common mistakes and how to fix them
- FORGOT to level the mixture → Use a spatula to press firmly and evenly.
- DUMPED too much honey → Adjust by adding more coconut or butter to balance sweetness.
- OVER-TORCHED the coconut → Toast on low heat, stirring constantly, for a gentle golden hue.
- MISSED the chilling step → Chill for at least 2 hours to set properly and prevent crumbling.
Quick fixes and pantry swaps
- When mixture feels too dry → Splash in a tiny bit of warm water and stir.
- If bars are too crumbly → Patch with a light drizzle of honey and press again.
- Over-torched coconut smell → Shield pan from direct heat and lower the flame immediately.
- DUMPED too much honey → Fix by adding more shredded coconut or a small pat of butter.
- When mixture won’t set → Rescue with extra chilling or add a touch of coconut oil to help firm up.
Prep, store, and reheat tips
- Prepare the mixture in advance and refrigerate for up to 24 hours; the coconut aroma deepens overnight.
- Store the cut bars in an airtight container in the fridge for up to a week, maintaining their chewy texture.
- For longer storage, freeze the bars wrapped tightly in plastic wrap and foil; they keep well for a month.
- Reheat slightly in the fridge for a softer bite or enjoy chilled for a firmer, more refreshing texture. The coconut flavor intensifies after chilling.
Top questions about coconut bars
1. Can I add other dried fruits or nuts?
Yes, you can use shredded dried mango or pineapple for a tropical twist, adding chewy texture and fruity aroma.
2. What if the mixture is too sticky to press?
If the mixture feels too sticky, sprinkle a little extra shredded coconut or lightly oil your hands to press easier.
3. Should I toast the coconut flakes first?
Using toasted coconut flakes enhances the nutty aroma and adds a richer flavor, making the bars smell like a tropical treat.
4. How long should I chill the bars?
Chilling the bars for at least 2 hours helps them set properly, making slicing cleaner and preventing crumbling.
5. How should I store the coconut bars?
Store leftovers in an airtight container in the fridge for up to a week. For longer storage, freeze them wrapped tightly in plastic wrap.
6. Can I swap the honey for something else?
You can substitute honey with maple syrup or agave nectar. Expect a milder, less sticky sweetness, but it still holds well.
7. Is there a good dairy-free alternative?
For a dairy-free version, replace butter with coconut oil or a neutral vegetable oil. The texture remains smooth but slightly different in richness.
8. Should I add vanilla or not?
Adding a splash of vanilla extract deepens the coconut flavor and adds warmth, but you can skip it for a pure coconut taste.
9. My mixture is too dry, what do I do?
If the mixture is too dry, stir in a tiny splash of warm water or additional honey to bring back moisture before pressing.
10. My bars are crumbly after cutting, how do I fix it?
When the bars feel too crumbly, patch with a drizzle of honey and press firmly again, then chill for better cohesion.
These no-bake coconut bars are a little treasure — simple, honest, and just the right amount of indulgent without the fuss. I keep a batch in the freezer for those moments when I need a quick sweet fix, and they always seem to disappear faster than I expect. There’s something about that chewy coconut and faint vanilla aroma that makes me smile, no matter what kind of day I’ve had.
In a way, they remind me to enjoy the small, straightforward pleasures — no oven, no complicated steps, just good ingredients coming together naturally. Plus, they’re a reminder that sometimes, the best treats are the ones you can throw together in minutes but savor just as long.

Hi, I’m Madison Lane, the cook, recipe creator, and heart behind this kitchen. Food has been part of my life for as long as I can remember. Some of my earliest memories are of standing beside my dad while he cooked, watching him move comfortably around the kitchen, tasting sauces, and explaining why patience mattered just as much as seasoning.
