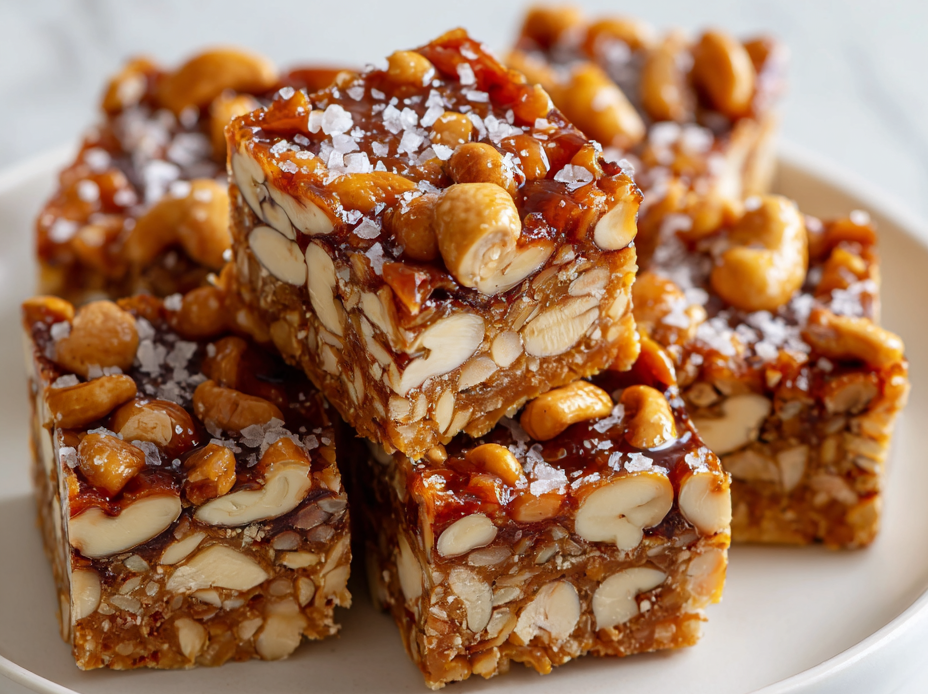
These no-bake nut bars are my go-to when mornings are chaos but I still crave something sweet and nourishing. They’re quick, honest, and satisfy that little urge for crunch and cream in one bite, without turning on the stove. I love how they come together in just minutes, making them perfect for busy days or last-minute snacks.
There’s a nostalgic comfort in grabbing one of these bars from the fridge, especially when I’m rushing out the door. They remind me of childhood treats but with a grown-up twist—more nuts, richer flavors. It’s a small act of self-care, slicing into firm, sticky edges that smell nutty and sweet, and feeling that satisfying crunch as I take a bite.
Focusing on how these no-bake nut bars serve as a quick, satisfying fix for busy mornings, blending nostalgia with practicality in every bite.
The story behind this recipe
- This recipe was born out of a cluttered afternoon, when I realized I had a jar of honey, a bag of mixed nuts, and a sudden craving for something sweet but wholesome. No time to turn on the oven, just a quick mix and press, and I had these bars ready before the kettle even boiled.
- It’s become my emergency snack, especially when I need a quick energy boost without the fuss. I remember the first time I made them, the smell of toasted nuts and melted honey filled the kitchen, making the whole house smell like a cozy bakery. Now, they’re my little secret weapon for busy days and unexpected guests.
- heading
- story_type
Ingredient breakdown
- Honey: I love how honey adds a sticky, sweet glue that holds everything together, giving the bars a chewy texture. If you want a less sweet version, try maple syrup or agave syrup, but expect a slightly different chew.
- Mixed nuts: I prefer a crunchy mix—almonds, cashews, and walnuts—for a satisfying bite and complex flavor. For a nuttier aroma, toast them lightly first; skip this step if you’re short on time.
- Rolled oats: These give the bars a hearty texture and a nutty scent. Using quick oats can make the mixture smoother, but you’ll lose some of that rustic chew.
- Dried fruit: Chopped dried apricots or cranberries add a tangy pop that brightens the richness. For a more intense fruity flavor, soak them briefly in warm water before chopping.
- Coconut oil: It melts into the mixture, making every bite just a little richer and more cohesive. If you prefer a milder flavor, swap in a neutral oil like light olive oil—just watch the texture to keep it firm.
- Sea salt: A pinch heightens all the nutty and sweet notes, especially if your nuts are unsalted. For a smoky twist, try a smoked sea salt, but use sparingly to avoid overpowering.
- Vanilla extract: Just a splash lifts the whole mix into fragrant territory. If you don’t have vanilla, a dash of almond extract works well, but keep it subtle.
Spotlight on key ingredients
Mixed nuts:
- Honey: I love how honey adds a sticky, sweet glue that holds everything together, giving the bars a chewy texture. If you want a less sweet version, try maple syrup or agave syrup, but expect a slightly different chew.
- I prefer a crunchy mix—almonds, cashews, and walnuts—for a satisfying bite and complex flavor. For a nuttier aroma, toast them lightly first; skip this step if you’re short on time.
- Rolled oats: These give the bars a hearty texture and a nutty scent. Using quick oats can make the mixture smoother, but you’ll lose some of that rustic chew.
Notes for ingredient swaps
- Sweetener: Maple syrup or agave syrup can replace honey for a different floral or neutral sweetness, though expect a slightly softer texture.
- Nuts: Use toasted sunflower seeds or pumpkin seeds for a nutty crunch without the expense or allergen concerns of tree nuts.
- Oats: Quinoa flakes or shredded coconut can add a similar chewiness and texture if oats aren’t available or preferred.
- Dried fruit: Chopped dried apricots or cherries offer bright, tangy bursts; soak them briefly in warm water to soften and release more flavor.
- Coconut oil: Light olive oil or avocado oil can substitute, providing similar fat content but a different subtle aroma; keep an eye on texture.
- Salt: Smoked sea salt adds a hint of smoky richness, while regular sea salt or Himalayan pink salt enhances the nutty sweetness.
- Flavor extract: Almond or caramel extract can be used instead of vanilla for a different aromatic note; use sparingly to avoid overpowering.
Equipment & Tools
- 20×20 cm (8×8 inch) square pan: Holds the mixture while it sets and helps shape the bars.
- Spatula: Presses the mixture evenly into the pan and assists in mixing.
- Sharp knife: Cuts the set mixture into neat bars.
- Mixing bowl: Combines dry ingredients and coats them with wet mixture.
Step-by-step guide to no-bake nut bars
- Gather your equipment: a 20×20 cm (8×8 inch) square pan, a sturdy spatula, a sharp knife, and a mixing bowl. The pan will hold your bars, and the spatula helps press them flat.
- Chop your nuts: roughly chop 1 1/2 cups of mixed nuts. Aim for uneven pieces—some chunky, some fine—this gives texture. Set aside.
- Line the pan: use parchment paper to line your square pan, leaving a slight overhang for easy removal later. This prevents sticking and messy cleanup.
- Melt the honey and coconut oil: in a small saucepan over low heat (about 80°C / 175°F), warm 1/2 cup honey and 2 tablespoons coconut oil. Stir until smooth and fragrant, about 2 minutes. Watch for bubbling; don’t let it boil.
- Combine dry ingredients: in your mixing bowl, toss the chopped nuts, 1 1/2 cups rolled oats, and 1/2 cup dried fruit. Mix well to distribute evenly.
- Add wet mixture: pour the melted honey-oil blend over the dry ingredients. Stir vigorously until everything is coated and sticky. It should smell nutty and sweet, with a hint of toasty oats.
- Press into the pan: transfer the mixture to your lined pan. Use the spatula or your hands (dampened slightly) to press evenly and firmly into the corners. This step is key for compact bars.
- Chill to set: place the pan in the fridge for at least 2 hours, or overnight if you can wait. The mixture will firm up, making it easier to cut.
- Cut into bars: once firm, lift the slab out using the parchment overhang. Use a sharp knife to cut into 8-10 rectangular bars. The edges should be clean, with a slight sheen.
- Store: keep the bars in an airtight container at room temperature for 3-4 days, or in the fridge for up to a week. For longer storage, freeze and thaw as needed.
After cutting, let the bars sit at room temperature for 10 minutes to soften slightly before serving. Wrap individually for easy snacks or store in an airtight container in the fridge.
How to Know It’s Done
- Mixture is sticky and well-coated, no dry patches.
- Bars hold shape and are firm after chilling.
- Edges are clean and slightly glossy when cut.
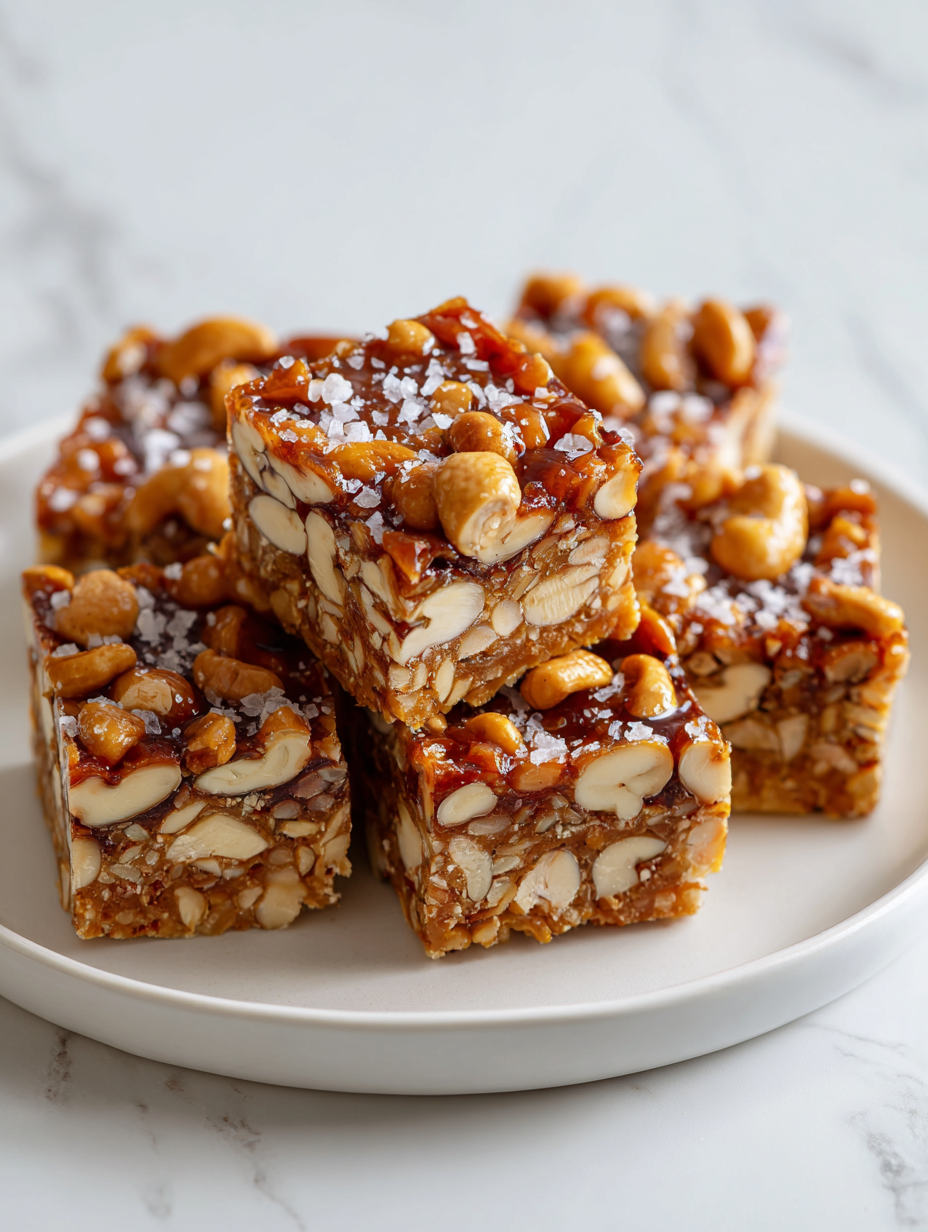
No-Bake Nut Bars
Ingredients
Equipment
Method
- Start by chopping your mixed nuts into uneven pieces for a satisfying crunch, then set them aside. Line your square pan with parchment paper, leaving overhang on the sides for easy removal.
- In a small saucepan over low heat, gently warm the honey and melted coconut oil until just fragrant and combined—this takes about 2 minutes. Keep the heat low to prevent bubbling or boiling.
- While the mixture warms, toss the chopped nuts, oats, and dried fruit in your mixing bowl, mixing thoroughly to distribute everything evenly.
- Pour the warm honey and coconut oil mixture over the dry ingredients, then stir vigorously until all components are coated and sticky, with a fragrant, nutty aroma filling the air.
- Transfer the mixture into your prepared pan, then press down firmly with a spatula or damp hands, creating an even, compact layer that fills the pan completely.
- Sprinkle a pinch of sea salt and vanilla extract over the top, then place the pan in the fridge to chill for at least 2 hours, allowing the mixture to set and firm up.
- Once set, lift the firm block out of the pan using the parchment overhang, then use a sharp knife warmed in hot water to cut into neat bars or squares.
- Arrange the bars on a plate or store them in an airtight container. They’re best enjoyed at room temperature or slightly chilled, with a satisfying crunch and chewy center in every bite.
Pro tips for perfect no bake nut bars
- Use a flexible spatula to press the mixture firmly into the pan for even bars.
- Toast nuts lightly first to enhance their aroma and add depth to the flavor.
- Melt honey and coconut oil gently over low heat until just fragrant and smooth—avoid boiling.
- Mix ingredients quickly and thoroughly to ensure all nuts and oats are evenly coated and sticky.
- Press mixture into the pan with damp hands or parchment to prevent sticking and compact the bars.
- Chill the bars at least 2 hours for proper firming—overnight is best for clean cuts and texture.
- Use a sharp knife and clean cuts to get neat edges—dipping knife in hot water helps.
Common mistakes and how to fix them
- FORGOT to oil the pan → Use parchment to prevent sticking.
- DUMPED too much salt → Add gradually, taste, then adjust.
- OVER-TORCHED the nuts → Toast on low heat, stir often.
- MISSED the chill time → Chill 2 hours for proper setting.
Quick fixes and pantry swaps
- When mixture is too dry → Splash in a teaspoon of water and stir until cohesive.
- If bars stick to the pan → Patch with a damp cloth or use parchment for easy removal.
- Splash melted honey before it burns → Reduce heat and stir gently, then resume melting.
- Dumped too much salt → Shake in a small pinch more honey or syrup to balance the flavor.
- Over-torched nuts → Shield with a lid or lower heat and stir constantly to avoid burnt flavor.
Prep, store, and reheat tips
- Prep the mixture ahead: chop nuts and measure ingredients the night before to save time and reduce morning chaos.
- Store the unpressed mixture in an airtight container in the fridge for up to 24 hours; it firms up slightly, making pressing easier.
- Bars can be kept in an airtight container at room temperature for 3-4 days, or refrigerated for up to a week, with flavors deepening slightly over time.
- Freeze the bars for longer storage—wrap individually, and thaw at room temperature for 10-15 minutes, until slightly soft and fragrant.
Top questions about no bake nut bars
1. Can I use a different sweetener?
Yes, you can swap honey for maple syrup or agave, but expect a slightly softer, less chewy texture.
2. Can I add dried fruit?
Absolutely, chopped dried apricots or cranberries work well. Soak them briefly to plump before mixing.
3. How do I cut the bars neatly?
Use a sharp knife warmed in hot water for clean cuts. Chilling the bars helps them firm up for slicing.
4. Should I toast the nuts first?
Yes, using toasted nuts enhances flavor and aroma. Toast lightly on low heat, stirring often.
5. How long do they last?
Store in an airtight container at room temp for 3-4 days or in the fridge for up to a week.
6. Can I freeze the bars?
Yes, they freeze well. Wrap individually, freeze, and thaw at room temp for 10-15 minutes before eating.
7. What if the mixture is too dry?
If the mixture is too dry, add a teaspoon of water and stir until sticky. It should hold together when pressed.
8. How do I prevent sticking?
Use parchment paper to line your pan for easy removal and cleaner edges when cutting.
9. What if I burn the nuts?
Over-torched nuts develop a bitter flavor. Toast on low heat and stir often to avoid burning.
10. How long should I chill the mixture?
Chilling the mixture for at least 2 hours ensures firm, clean-cut bars. Overnight is even better.
These no-bake nut bars are more than just a quick treat; they’re a reminder that simple ingredients can come together into something satisfying and honest. When I need a little energy or a moment of comfort, slicing into one of these bars always brings a sense of accomplishment and nostalgia.
They’re perfect for busy mornings or last-minute cravings, and I love how forgiving and adaptable they are. Honestly, I keep a stash in the fridge just so I can reach for one when I need a quick, wholesome fix that tastes like a little bit of home.

Hi, I’m Madison Lane, the cook, recipe creator, and heart behind this kitchen. Food has been part of my life for as long as I can remember. Some of my earliest memories are of standing beside my dad while he cooked, watching him move comfortably around the kitchen, tasting sauces, and explaining why patience mattered just as much as seasoning.
