This no-bake cornflake cookies recipe is my quick fix for those afternoons when time slips away and I need a sweet treat fast. It’s all about turning simple pantry staples into something that feels like a small victory, no oven required. Plus, the scent of melting butter and toasted marshmallows always pulls me back to childhood afternoons, sticky fingers and all.
What makes this recipe stand out is its forgiving nature. No fancy ingredients, no complicated steps—just honest, straightforward comfort in every bite. It’s perfect for when you want a nostalgic moment or a last-minute gift for someone who appreciates a little homemade sweetness.
In these busy times, I keep the ingredients on hand for this very reason—because sometimes, the best moments happen when you keep it simple, and this recipe is the epitome of that. It’s a reminder that comforting doesn’t have to mean complicated or time-consuming.
This recipe is my go-to for those chaotic afternoons when I need a sweet fix without the fuss of baking, reminding me that simple ingredients can still create something nostalgic and satisfying.
A Nostalgic Sweet Fix
- This recipe saved me during a surprise visit from friends—quick, nostalgic, and so satisfying.
- Baking isn’t my thing, but these cookies make me feel like a pastry chef every time I whip them up.
- There’s a chaotic joy in watching the marshmallows melt into gooey magic, knowing I’ll have a sweet treat in minutes.
- Every time I make these, I’m transported back to childhood kitchens, sticky fingers and all.
- When I need a simple, comforting moment, this recipe never lets me down.
The story behind this recipe
- This recipe came from a lazy afternoon in my childhood kitchen. My grandma would always keep a jar of marshmallows and cornflakes on hand, ready for improvising quick treats. I loved how she’d toss everything together without fuss, creating something sweet and crunchy in minutes. It’s a messy, honest process that feels like a little rebellion against overcomplication.
- One day, I realized these cookies weren’t just a nostalgic snack—they’re a symbol of simplicity during chaos. No oven, no fuss, just a handful of ingredients and a bit of patience. They remind me that sometimes, the best things happen when you keep it straightforward and trust in the basics.
- heading
- story_type
Historical and Cultural Tidbits
- These cookies likely originated during the Great Depression, when resourcefulness made simple ingredients shine.
- Cornflake cookies became popular in mid-20th century America, often as a quick, no-bake dessert for busy households.
- The recipe shares roots with other cereal-based treats, like Rice Krispies squares, emphasizing frugality and improvisation.
- Historically, melting marshmallows and butter together was a clever way to create a sticky binder without baking.
- Despite their humble origins, no-bake cornflake cookies have endured as a nostalgic comfort food for generations.
Ingredient breakdown: key components
- Cornflakes: I love the crunch and how they stay crispy even after mixing, but you can try bran flakes for a nuttier flavor.
- Marshmallows: Their gooey meltiness makes the magic happen; substitute with vegan marshmallows if you need a dairy-free version.
- Butter: It gives richness and helps everything hold together, but margarine can work if you’re out—expect a slightly different flavor.
- Sugar: Just a touch for sweetness, but feel free to add a little honey or corn syrup for extra stickiness and depth.
- Vanilla extract: A splash adds warmth and depth; skip if you prefer a more neutral, nostalgic flavor.
- Optional add-ins: Nuts or dried fruit can elevate the cookies—toast the nuts beforehand for extra aroma and crunch.
Spotlight on key ingredients
Cornflakes:
- I love their crispy texture that stays even after mixing, but bran flakes add nuttiness if you prefer a different crunch.
- Marshmallows: Their gooey melt creates that sticky hold; vegan marshmallows work as a dairy-free option but melt slightly differently.
Marshmallows:
- The secret to that sticky, sweet glue; watch for the gooey melt and slight caramel aroma as they soften.
- Butter: It enriches the mixture and helps everything stick together; room temperature butter melts faster and makes mixing easier.
Notes for ingredient swaps
- Sweetener: Honey or agave nectar can replace sugar for a more floral or neutral sweetness, but expect a slightly different sticky texture.
- Marshmallows: Vegan marshmallows work well; they melt similarly but may have a subtler flavor and less gooeyness.
- Butter: Coconut oil or margarine can be used if you’re dairy-free, though they’ll alter the richness and aroma slightly.
- Cornflakes: Bran flakes or toasted oats add crunch and a nuttier flavor, but might change the overall lightness of the cookies.
- Vanilla: Almond extract or vanilla bean paste can deepen flavor—use sparingly to avoid overpowering the marshmallow sweetness.
- Add-ins: Nuts or dried fruits can be swapped in for variety; toast nuts beforehand for extra aroma and crunch.
Equipment & Tools
- Large mixing bowl: To combine ingredients if needed for other recipes or prep.
- Saucepan: To melt butter and marshmallows evenly over low heat.
- Spatula: For folding ingredients and scraping the saucepan.
- Parchment-lined tray: To set and cool the cookies without sticking.
Step-by-step guide to no bake cornflake cookies
- Gather your equipment: a large mixing bowl, a saucepan, a spatula, and a parchment-lined tray. The bowl is for mixing, saucepan for melting marshmallows and butter, spatula for folding, and tray to set the cookies.
- In the saucepan, melt 1/2 cup (115g) butter over low heat. Keep the heat gentle; bright melting means it’s ready. Stir occasionally until fully melted, about 2-3 minutes.
- Add 10 oz (about 40 large) marshmallows to the melted butter. Stir continuously until they’re completely melted and gooey, about 3-4 minutes. The smell of toasted marshmallows should fill the air.
- Remove from heat. Quickly pour in 4 cups (about 150g) cornflakes. Fold gently with the spatula, pressing down to coat all the flakes evenly. Watch for the cereal to stay crispy but coated in sticky marshmallow goo.
- Scoop spoonfuls of the mixture onto the parchment-lined tray. Use the back of the spoon or a small ice cream scoop for uniformity. Slightly press each cookie to flatten if desired.
- Let the cookies rest at room temperature for about 30 minutes. They’ll firm up and set, with a shiny, sticky exterior and crunchier edges. If in a hurry, refrigerate for 15 minutes.
- Once set, check the texture: cookies should hold shape but still be chewy inside. The appearance should be glossy and slightly crackled. If they’re too soft, give them more time to firm up.
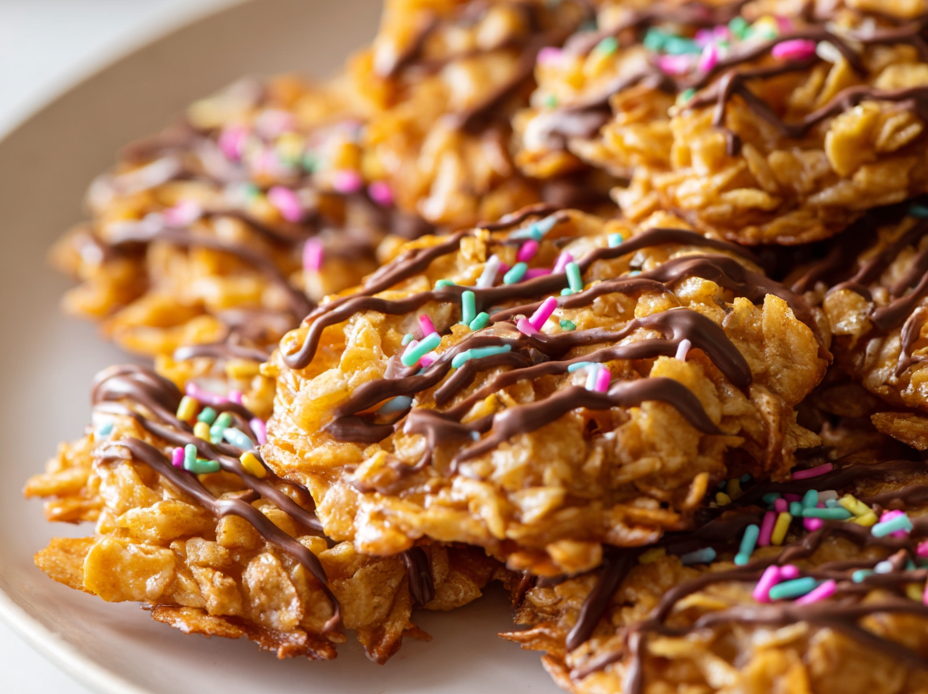
- Enjoy your no-bake cornflake cookies, feeling the crunchy exterior give way to gooey marshmallow. Store leftovers in an airtight container at room temp for up to 3 days.
Let the cookies rest at room temperature for about 30 minutes until firm. Then, gently peel them off the parchment and serve or store in an airtight container.
How to Know It’s Done
- Marshmallows are fully melted and gooey before adding cereal.
- Cookies hold shape after resting, with a glossy, crackled surface.
- Edges are crunchy but interior remains chewy when properly set.
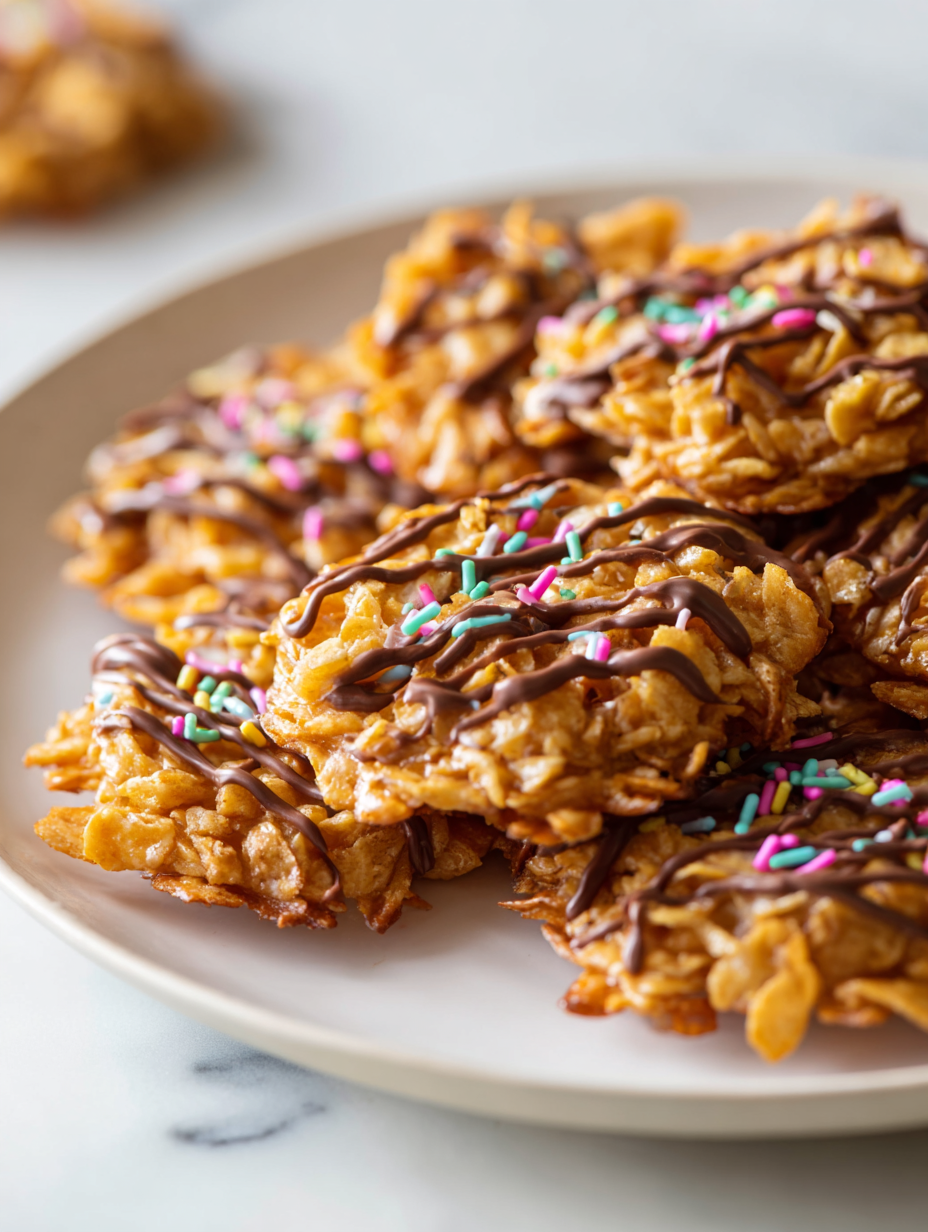
No-Bake Cornflake Cookies
Ingredients
Equipment
Method
- Place a large saucepan over low heat and add the butter. Stir gently until the butter melts completely, filling your kitchen with a warm, buttery aroma.
- Add the marshmallows to the melted butter and stir continuously. Watch as they soften and melt into a sticky, gooey mixture, releasing a sweet, toasted marshmallow scent.
- Once the marshmallows are fully melted and smooth, remove the saucepan from heat. The mixture should be glossy and slightly thickened, ready to coat the cereal.
- Add the cornflakes into the saucepan and gently fold them into the marshmallow mixture with a spatula. Be careful not to crush the flakes; fold until they are evenly coated and sticky.
- Using a spoon or small ice cream scoop, drop spoonfuls of the mixture onto a parchment-lined tray. Gently press down on each cookie to shape and flatten slightly, ensuring they hold together well.
- Let the cookies sit at room temperature for about 30 minutes to set and firm up. They will develop a shiny, crackled surface, with a chewy center and crispy edges.
- Once firm, carefully peel the cookies off the parchment paper. Enjoy immediately or store in an airtight container for up to 3 days for a delicious, nostalgic treat.
Notes
Tips & Tricks for Perfect Cookies
- Use fresh marshmallows for maximum gooeyness—older ones can be dry and less sticky.
- Melt butter and marshmallows over low heat—bright bubbling indicates perfect melting, avoid high heat to prevent burning.
- Fold cereal gently—overmixing can crush flakes, preserving crunch is key for texture.
- Chill the mixture slightly before scooping—this helps the cookies hold shape better when setting.
- Press the cookies lightly with the back of a spoon—this ensures even thickness and compactness.
- Let the cookies rest at room temperature—about 30 minutes until they’re firm and glossy, no rush to refrigerate.
- Add a pinch of salt or vanilla—enhances sweetness and depth, don’t skip the flavor boost.
Common mistakes and how to fix them
- FORGOT to check marshmallow melt → Use low heat and stir constantly to prevent burning.
- DUMPED in too many cereal → Add cereal gradually, folding gently for even coating.
- OVER-TORCHED the butter mixture → Remove from heat immediately if smell turns smoky or color darkens.
- MISSED the resting step → Let cookies cool and set at room temperature for best texture.
Quick fixes and pantry swaps
- If marshmallows seize or burn, splash in a little cold water to stop the melting.
- When cookies stick to parchment, grease the paper lightly or use a silicone mat.
- Splash a few drops of vanilla or water if the mixture feels too dry or crumbly.
- Patch over cracks by gently pressing the mixture back together while still warm.
- Shield from humidity by storing in an airtight container; moisture makes them lose crunch.
Prep, store, and reheat tips
- You can prepare the mixture a day in advance; keep it covered in the fridge to prevent drying out, and it will stay fresh and sticky.
- Store the finished cookies in an airtight container at room temperature for up to 3 days; the edges stay crisp, and the marshmallow retains its chewy texture.
- Refrigerate for 15-20 minutes if you want a firmer cookie; the coolness intensifies the marshmallow flavor and makes them easier to handle.
- Gently reheat leftovers in the microwave on low power for 10-15 seconds if the marshmallow feels too stiff; the smell of toasted marshmallow and butter will refresh beautifully.
Top questions about no bake cornflake cookies
1. How do I know when marshmallows are melted enough?
Look for marshmallows that are soft and pliable, not hardened or stale. This ensures easy melting and gooey texture.
2. What’s the right consistency for the marshmallow mixture?
The mixture should be glossy and slightly thickened but still pourable. If it’s too runny, give it a minute longer on low heat.
3. How can I tell when the cookies are ready to eat?
Cookies are done when they hold their shape and have a shiny, crackled surface after setting for about 30 minutes.
4. Why are my cookies too soft or sticky?
If the cookies seem too soft or sticky, let them rest longer at room temperature. For firmer cookies, refrigerate for 10-15 minutes.
5. Can I substitute cornflakes with something else?
Use fresh cornflakes to keep the crunch, but you can try toasted oats for a nuttier flavor and slightly softer texture.
6. How should I store these cookies?
Store leftovers in an airtight container at room temperature for up to 3 days. For longer storage, refrigerate but expect slight moisture loss.
7. Can I reheat these cookies?
Reheat briefly in the microwave on low power (10-15 seconds) to soften marshmallows and re-enhance aroma. Let cool before serving.
8. What if my marshmallow mixture burns or seizes?
If marshmallows seize or burn, splash in a tiny bit of cold water and stir gently to loosen the mixture.
9. What’s the best tool for mixing?
Use a silicone spatula for folding to avoid crushing cereal and to get every bit coated evenly.
10. Can I customize the ingredients?
Add a pinch of vanilla or a dash of salt to enhance flavor. Toasted nuts or dried fruit can also add texture and taste.
These cookies are a reminder that sometimes, the simplest ingredients create the most satisfying treats. There’s a certain charm in watching marshmallows melt into gooey magic, all without turning on the oven.
Whenever I make these, I think about childhood afternoons and the comfort of knowing I can whip up something nostalgic and sweet in just a few minutes. No matter how chaotic the day, a batch of these always offers a moment of calm and sweetness.

Hi, I’m Madison Lane, the cook, recipe creator, and heart behind this kitchen. Food has been part of my life for as long as I can remember. Some of my earliest memories are of standing beside my dad while he cooked, watching him move comfortably around the kitchen, tasting sauces, and explaining why patience mattered just as much as seasoning.
