This no bake marshmallow bars recipe is my go-to when I need a sweet fix in a flash. It’s one of those treats that feels like a warm hug from childhood, but with a little modern twist. No fuss, no oven, just a quick melt-and-mix that turns into something chewy and gooey in all the right ways.
What makes this recipe special isn’t just the ease—it’s how it turns pantry staples into a nostalgic, crowd-pleasing dessert. It’s perfect for busy nights, impromptu gatherings, or whenever you’re craving something sweet but don’t want to turn on the stove. Plus, it’s a great one to make with kids or for those last-minute snack attacks.
This recipe is my secret weapon for a quick, no-fuss treat that captures childhood nostalgia with a modern twist, perfect for busy weeknights or last-minute gatherings.
The story behind this recipe
- This recipe came together on a chaotic afternoon when I needed something sweet but had no time for baking. I remembered how my grandma used to toss marshmallows into everything—her secret stash in the pantry was legendary. That nostalgic, gooey mess sparked the idea for a no-bake bar that’s simple but hits all the right notes of comfort.
- It’s one of those recipes I kept in my back pocket for busy weekends, last-minute get-togethers, or those rare moments I crave childhood in a bite. Making it feels like a little act of rebellion against the busy, over-complicated world we live in. Just melt, mix, press, and done—sweet relief in a pan.
- heading: The story behind this recipe
Ingredient breakdown: key components
- Marshmallows: I love how they turn gooey and sticky when melted. For a smoother texture, use fresh marshmallows rather than stale ones.
- Butter: It adds richness and helps everything meld together. I prefer unsalted butter for control over the saltiness, but salted works fine if that’s what you have.
- Golden syrup or honey: It gives a subtle sweetness and glossy finish. Swap with corn syrup if needed, but be aware it might alter the flavor slightly.
- Cereal or graham cracker crumbs: I use crispy rice cereal for a light crunch, but crushed graham crackers give a richer, more nostalgic flavor—adjust based on your mood.
- Vanilla extract: Just a splash boosts the sweetness and depth. Skip it if you want a more neutral bar, or try almond extract for a twist.
- Chocolate (optional): I love melting dark or milk chocolate over the top for a decadent finish. Keep it simple or add sprinkles—your call, but the chocolate really brings it all together.
- Sea salt flakes: A pinch on top elevates the sweetness and adds a contrast that makes the flavors pop. Don’t skip this step if you want that perfect balance.
Spotlight on key ingredients
Marshmallows:
- I love how they turn gooey and sticky when melted. For a smoother texture, use fresh marshmallows rather than stale ones.
- Butter: It adds richness and helps everything meld together. I prefer unsalted butter for control over the saltiness, but salted works fine if you have it.
Sweeteners and Crunch:
- Golden syrup or honey: It gives a subtle sweetness and glossy finish. Swap with corn syrup if needed, but be aware it might alter the flavor slightly.
- Cereal or graham cracker crumbs: I use crispy rice cereal for a light crunch, but crushed graham crackers give a richer, more nostalgic flavor—adjust based on your mood.
Notes for ingredient swaps
- Dairy-Free: Swap butter for coconut oil or a dairy-free margarine. It may alter the richness slightly, but the bars will still hold together well.
- Vegan Marshmallows: Use vegan marshmallows made with aquafaba or other egg substitutes. The texture remains sticky and sweet, but flavor might be a tad less marshmallow-y.
- Sweetener Variation: Honey or agave syrup can replace golden syrup or corn syrup for a different sweet, with a slightly more floral or caramel note.
- Crunch Alternative: Cereal or graham cracker crumbs can be replaced with crushed pretzels or cookie crumbs for a salty or more decadent crunch.
- Chocolate Topping: Swap dark or milk chocolate with white chocolate or flavored coatings. Keep in mind, white chocolate has a creamier, sweeter profile.
- Add-ins: Stir in chopped nuts, dried fruit, or mini candies for extra texture and flavor. Just fold in gently before pressing into the pan.
- Salt: Use flaky sea salt or Himalayan pink salt flakes on top for a more pronounced salty contrast.
Equipment & Tools
- 9×13 inch pan: Holds the mixture for setting and slicing.
- Parchment paper: Prevents sticking and makes removal easy.
- Large heatproof bowl: Melts marshmallows and butter evenly.
- Spatula: Stirs and presses the mixture into the pan.
- Microwave or double boiler: Gently melts marshmallows and butter without burning.
- Sharp knife: Slices bars cleanly after setting.
Step-by-step guide to marshmallow bars
- Equipment & Tools: Line a 9×13 inch pan with parchment paper for easy removal. Use a large heatproof bowl for melting marshmallows and butter. Have a spatula and a sturdy spoon ready for mixing. A microwave or double boiler is needed to melt ingredients smoothly.
- Melt butter and marshmallows: In a large microwave-safe bowl, combine 4 cups of marshmallows and 1/2 cup of butter. Microwave on high for 1 minute. Stir until smooth. If using a double boiler, melt gently over low heat, stirring constantly. The mixture should be glossy and oozy.
- Add flavor and crunch: Mix in 1 teaspoon vanilla extract and 4 cups of crispy rice cereal or crushed graham crackers. Fold until evenly coated and cereal is just starting to soften but still crunchy. Be gentle to preserve texture.
- Transfer to pan: Quickly pour the mixture into your prepared pan. Use a spatula or the back of a spoon to press it evenly into the corners. Press down firmly, but don’t mash—aim for a compact, even layer. Work fast to prevent setting too soon.
- Chill and set: Let the bars rest at room temperature for 10-15 minutes. Then, refrigerate for at least 1 hour until firm. If you’re in a hurry, chill in the freezer for 30 minutes, but don’t forget to set a timer.
- Slice and serve: Use a sharp knife to cut into squares or rectangles. For cleaner cuts, wipe the knife with a damp cloth between slices. Serve immediately or store for later.
- Resting & Finishing: Allow the bars to rest in the fridge for at least 1 hour to fully set. Once firm, cut into individual pieces and serve. For an extra touch, melt chocolate and drizzle over the top before chilling. Keep in an airtight container at room temperature for up to 3 days or in the fridge for up to a week.
- Checkpoints & How to Know It’s Done: The mixture should be glossy and sticky before pressing. Bars should be firm but not crumbly after chilling. The edges will be clean and the surface smooth, with no sticky or gooey spots.
Let the bars rest in the fridge for at least an hour until firm. Use a sharp knife to cut into squares. For a decorative touch, drizzle melted chocolate over the top before chilling. Serve directly from the fridge or at room temperature, depending on your preference.
How to Know It’s Done
- Mixture is glossy and easily spreadable before pressing.
- Bars are firm and hold shape after chilling.
- Edges are clean and surface is smooth, no sticky spots.
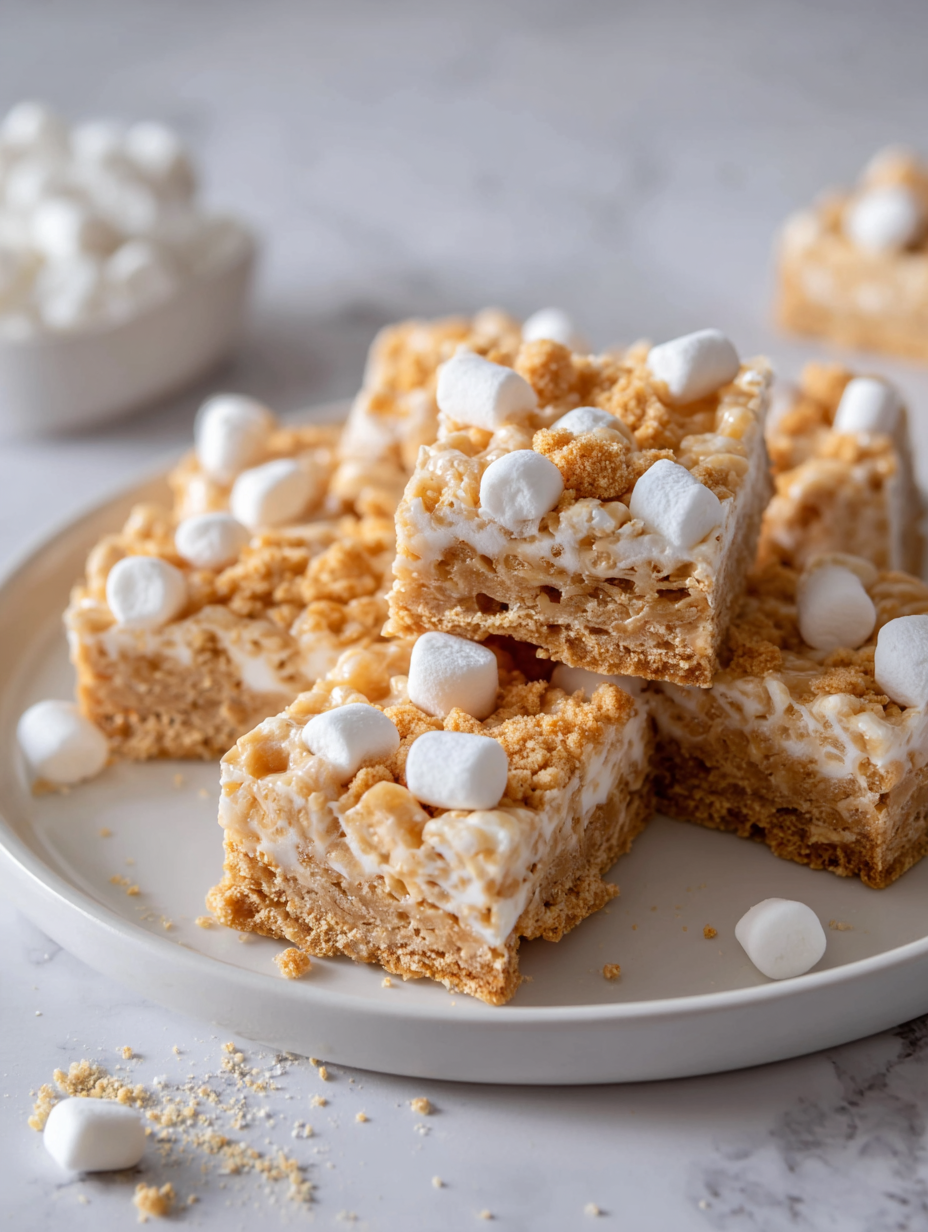
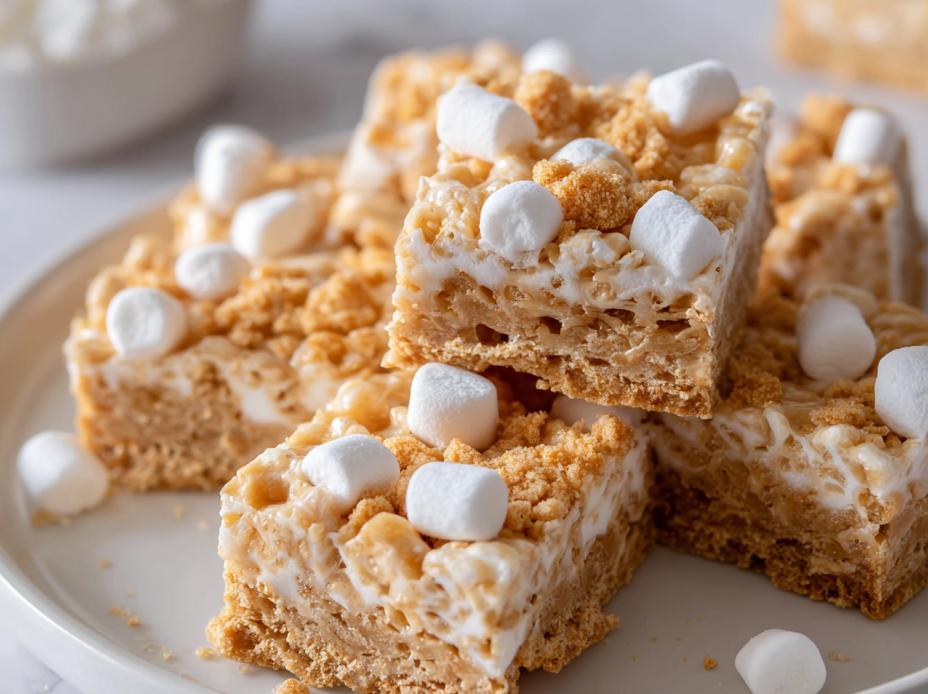
No-Bake Marshmallow Bars
Ingredients
Equipment
Method
- Line your 9x13 inch pan with parchment paper to keep the bars from sticking.
- Combine marshmallows and butter in a large heatproof bowl. Microwave on high for about 1 minute until the mixture is bubbling and smooth when stirred.
- Stir the melted mixture until glossy and fully combined, then add vanilla extract and mix again to incorporate the aroma.
- Gently fold in the cereal or crushed graham crackers, mixing just until evenly coated but still slightly crunchy.
- Pour the mixture into your prepared pan and press it down firmly with a spatula or the back of a spoon, creating an even, compact layer.
- Let the bars rest at room temperature for about 10-15 minutes to set slightly, then transfer to the fridge and chill for at least 1 hour until firm.
- Once chilled and firm, remove from the fridge and lift the bars out of the pan using the parchment paper. Slice into squares with a sharp knife, wiping it clean between cuts for neat edges.
- If desired, melt your chocolate and drizzle over the bars for a decadent finish. Sprinkle with a pinch of sea salt for contrast.
- Serve immediately or store in an airtight container at room temperature for up to 3 days or in the fridge for up to a week.
Tips for perfect marshmallow bars
- Use fresh marshmallows: They melt more smoothly and create an even, gooey texture without lumps.
- Butter evenly: Melt it fully before mixing to ensure a silky, uniform coating for your cereal or graham crackers.
- Add vanilla last: Stir in vanilla extract after melting to preserve its bright aroma and prevent evaporation.
- Press firmly: Use the back of a spatula or a glass to press the mixture into the pan, avoiding air pockets and keeping it tight.
- Chill thoroughly: Refrigerate for at least an hour until bars are firm and slices cleanly without sticking.
- Avoid over-melting: Melt marshmallows gently, watching for a shiny, oozy consistency—don’t rush it to avoid burning or seizing.
- Work quickly: The mixture sets fast as it cools, so assemble and press before it starts to stiffen.
Common mistakes and how to fix them
- FORGOT to evenly coat the mixture before pressing → use a spatula for uniform spread.
- DUMPED too much marshmallow → reduce to 3 cups for a less sticky bar.
- OVER-TORCHED the chocolate topping → melt chocolate on low heat, stir constantly.
- MISSED the chilling step → chill at least 1 hour for bars to set properly.
Quick fixes and pantry swaps
- When mixture is too sticky → splash a little warm water and knead gently.
- If bars crumble when slicing → chill longer or briefly warm knife for cleaner cuts.
- Splash melted chocolate → shield with a cloth to prevent burning and crackling.
- Dumped too much cereal → swap with crushed pretzels for a salty crunch.
- Over-torched chocolate → rescue by stirring in a teaspoon of vegetable oil for shine and smoothness.
Prep, store, and reheat tips
- You can prepare the mixture a day in advance; keep it covered in the fridge to prevent it from drying out and absorb fridge odors.
- Store the cut bars in an airtight container at room temperature for up to 3 days, or in the fridge for up to a week, to keep them firm and fresh.
- Refrigeration helps set the bars fully, but take them out about 10 minutes before serving to soften slightly and enhance flavor.
- For longer storage, wrap bars individually in plastic wrap and freeze for up to a month. Thaw in the fridge or at room temperature before serving.
- Reheating isn’t necessary, but if you want to soften refrigerated bars, leave them at room temperature for 10-15 minutes until they become chewy again.
Top questions about marshmallow bars
1. Can I use stale marshmallows?
Use fresh marshmallows for a smoother, more gooey melt. Old ones can be grainy and resist melting evenly.
2. Can I substitute golden syrup?
Yes, you can swap honey or agave for golden syrup. Expect a slightly different flavor, more floral or caramel.
3. Should I add salt on top?
Add a pinch of sea salt flakes on top before chilling to enhance sweetness and add a nice contrast.
4. How long should I chill the bars?
Chill the bars for at least an hour until firm. If rushed, 30 minutes in the freezer works, but they may be softer.
5. My mixture is too sticky, what do I do?
If the mixture is too sticky to press down, lightly butter the spatula or dampen it slightly to prevent sticking.
6. How do I cut the bars cleanly?
Use a sharp knife wiped with a damp cloth for clean, neat cuts. Warming the knife slightly helps if it’s sticking.
7. How should I store leftover bars?
Store in an airtight container at room temperature for 2-3 days or in the fridge for up to a week. Wrap individually for longer storage.
8. How do I re-soften refrigerated bars?
To soften chilled bars, let them sit at room temperature for 10 minutes before serving. They’ll regain a chewy texture.
9. How do I melt chocolate without burning it?
When melting chocolate, do it low and slow, stirring constantly to prevent burning or seizing. A double boiler helps control heat.
10. Can I add other ingredients?
Add-ins like nuts or dried fruit can be folded in before pressing. Be gentle to avoid breaking the cereal or marshmallows.
These no bake marshmallow bars are a reminder that sometimes, simple ingredients create the most satisfying treats. They’re perfect for when time is tight but you still want that nostalgic, chewy bite. Plus, they’re a little messy, a little sweet, and totally forgiving.
Sharing them with friends or family feels like passing around a piece of childhood comfort. No matter the occasion, they come together quickly and disappear just as fast—because honestly, who can resist that gooey, crispy goodness?

Hi, I’m Madison Lane, the cook, recipe creator, and heart behind this kitchen. Food has been part of my life for as long as I can remember. Some of my earliest memories are of standing beside my dad while he cooked, watching him move comfortably around the kitchen, tasting sauces, and explaining why patience mattered just as much as seasoning.
