Sometimes, late at night, I find myself craving something sweet but don’t want to deal with the fuss of baking or the guilt of a heavy slice. These no bake mini cheesecakes come together fast, using ingredients I always keep on hand—cream cheese, a crumbly biscuit base, and a hint of lemon. They’re small, personal, and perfect for those spontaneous moments when sweetness is needed, but time or energy is low.
What I love most is how adaptable they are—tweaking flavors or toppings without messing up the whole batch. They’re like a little secret stash of comfort, ready whenever that craving hits. And honestly, in a world where everything’s fast-paced, these tiny cheesecakes remind me that you can indulge without the fuss, keeping things simple yet satisfying.
This recipe is inspired by my late-night craving for something sweet but avoiding the usual heavy desserts. It’s a no-bake, mini indulgence that’s perfect for spontaneous cravings, and it’s made in small, personal portions—no leftovers, no fuss.
This recipe is inspired by my late-night craving for something sweet but avoiding the usual heavy desserts. It’s a no-bake, mini indulgence that’s perfect for spontaneous cravings, and it’s made in small, personal portions—no leftovers, no fuss.
Spontaneous Sweetness in Miniature
- These tiny cheesecakes remind me of childhood desserts, simple and honest, wrapped in a moment of nostalgia.
- I love how effortless they are—no oven, no fuss, just quick satisfaction when cravings strike unexpectedly.
- Sharing these mini treats with friends feels like passing around secret happiness, each bite sparking smiles and a sense of indulgence.
Spontaneous Cheesecake Inspiration
- This recipe is a result of late-night kitchen experiments, where I wanted something sweet but didn’t want to turn on the oven. I kept thinking about how cheesecake always feels so indulgent yet heavy, and I wondered if I could make a lighter, more spontaneous version that still hits that creamy, tangy spot. The mini size makes it feel like a secret indulgence—just enough to satisfy without overdoing it.
- There’s a bit of nostalgia in those small, individual desserts—reminding me of childhood treats, but with a grown-up twist. I love how flexible these are; you can swap toppings or flavorings on a whim, making them perfect for last-minute gatherings or a quick treat after a long day. It’s funny how such simple ingredients can turn into something so satisfying, especially when you’re craving comfort with minimum fuss.
- heading
- story_type
Historical Tidbits on Mini Cheesecakes
- These mini cheesecakes originated from a 1970s trend of bite-sized desserts meant for parties, making them perfect for sharing.
- The no-bake version became popular during times of rationing and limited oven access, especially in the post-war era.
- In many cultures, small, individual desserts like these symbolize a personal treat, blending practicality with indulgence.
Key Ingredients Breakdown
- Cream cheese: I love how it becomes silky and smooth when softened—make sure it’s at room temp, or you’ll get lumps. You want that luscious, melt-in-your-mouth texture with a slight tang.
- Graham cracker crumbs: I crush these until fine, then mix with butter until they clump nicely—think sandy, slightly smoky aroma. Swap with digestive biscuits if you like a richer, slightly more buttery base.
- Sugar: I prefer a fine caster sugar because it dissolves easily, keeping the filling smooth. If you only have regular granulated, give it a quick blitz in the food processor first.
- Lemon juice: Brightens everything up with a zesty zing—don’t skip it. You can substitute lime for a different citrus punch or add a touch of vanilla for extra warmth.
- Heavy cream: Whipped until just fluffy, it adds lightness. If you’re dairy-free, coconut cream works well but gives a richer, coconutty flavor and denser texture.
- Toppings (optional): Fresh berries bring a pop of color and tartness, while a drizzle of caramel adds sweetness. Use whatever you love for that final flair—fruit, jams, or even chocolate shavings.
- Salt: Just a pinch enhances all the flavors—don’t forget it. If you’re sugar-sensitive, reduce slightly but keep that little boost of savory balance.
Spotlight on key ingredients
Cream cheese and Graham crackers:
- Cream cheese: I love how it becomes silky and smooth when softened—make sure it’s at room temp, or you’ll get lumps. You want that luscious, melt-in-your-mouth texture with a slight tang.
- Graham cracker crumbs: I crush these until fine, then mix with butter until they clump nicely—think sandy, slightly smoky aroma. Swap with digestive biscuits if you like a richer, slightly more buttery base.
Notes for ingredient swaps
- Dairy-Free: Swap cream cheese for a plant-based alternative like cashew-based cream cheese. The texture remains creamy, but it may be slightly less tangy.
- Gluten-Free: Use gluten-free graham crackers or digestive biscuits. The flavor stays familiar, but the base might be a bit crumblier.
- Sweetener: Replace sugar with honey or maple syrup. These add a richer, more complex sweetness and slightly alter the texture.
- Lemon Juice: Use lime or orange juice for a different citrus note. Lime adds a sharper zing, while orange brings a sweeter brightness.
- Heavy Cream: Substitute with coconut cream or full-fat Greek yogurt. Coconut gives a tropical flavor, yogurt adds tang and density.
- Crust Base: Try crushed pretzels for a salty crunch, or cookies like Oreo for a richer, chocolatey base. Each brings a unique twist.
- Toppings: Fresh berries can be replaced with sliced fruits or fruit compotes, or a drizzle of caramel or chocolate for varied indulgence.
Equipment & Tools
- Mini muffin tin or ramekins: To shape and hold individual cheesecakes.
- Mixing bowl: To prepare the crust and filling.
- Spoon and spatula: For mixing, scooping, and smoothing the layers.
- Small whisk: To whisk the cream cheese and cream smoothly.
- Plastic wrap: To cover and chill the cheesecakes.
Step-by-step Guide to No Bake Mini Cheesecakes
- Gather your equipment: a mini muffin tin or small ramekins, a mixing bowl, a spoon, a spatula, and a small whisk. The muffin tin helps with easy removal and presentation.
- Make the crust: Crush about 8-10 graham crackers or digestive biscuits into fine crumbs. Mix with 3 tablespoons melted butter until evenly coated and sandy. Divide equally into mini muffin cups or ramekins, pressing down firmly with the back of a spoon to form a compact base. Chill in the fridge for 10 minutes to set.
- Prepare the filling: In a mixing bowl, soften 8 oz cream cheese at room temperature for about 15 minutes. Add 1/4 cup sugar, a teaspoon of lemon juice, and a pinch of salt. Whisk until smooth and creamy, with no lumps. Fold in 1/2 cup whipped heavy cream gently, avoiding deflation.
- Assemble the cheesecakes: Spoon the filling over the chilled crusts, smoothing the tops with a spatula. Fill each cup close to the edge for a clean look. Tap gently to remove air bubbles and even out the surface.
- Chill and set: Cover the tray with plastic wrap and refrigerate for at least 2 hours, preferably 4, until the cheesecakes are firm and chilled through. During this time, flavors meld and texture stabilizes.
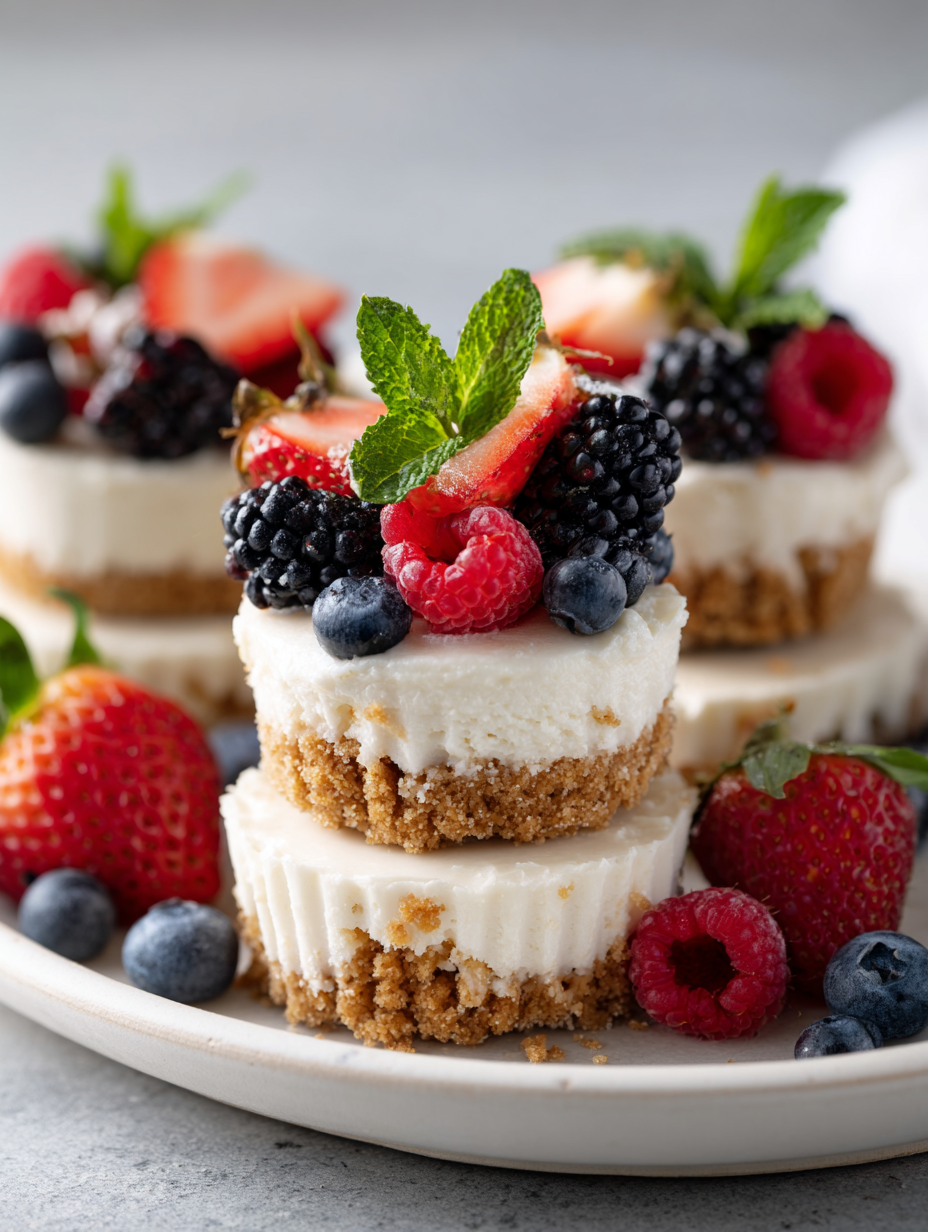
- Finish and serve: Decorate with fresh berries, a drizzle of fruit jam, or a sprinkle of crushed nuts just before serving. These mini treats are best enjoyed cold, with a slight wobble and a bright, creamy aroma.
Refrigerate uncovered for the full set time. Serve directly from the fridge, topped with fresh fruit or a dusting of powdered sugar for a polished look.
How to Know It’s Done
- Cheesecake filling is firm but slightly jiggly at the center after chilling.
- Crust is golden-brown and holds together when pressed.
- Toppings are vibrant and fresh, with no excess moisture pooling.
No-Bake Mini Cheesecakes
Ingredients
Equipment
Method
- Crush the graham crackers into a fine, sandy consistency using a food processor or by placing them in a plastic bag and crushing with a rolling pin.
- Mix the crushed crackers with melted butter until evenly coated, creating a crumbly, slightly sticky mixture.
- Divide the crumb mixture evenly into the cups of a mini muffin tin or small ramekins, pressing down firmly with the back of a spoon to form a compact crust. Chill in the fridge for about 10 minutes to firm up.
- While the crust chills, soften the cream cheese in a mixing bowl until smooth and creamy, about 2-3 minutes with a small whisk or spoon.
- Add the sugar, lemon juice, and a pinch of salt to the cream cheese, then whisk until the mixture is smooth and slightly fluffy, with no lumps.
- Gently fold the whipped heavy cream into the cream cheese mixture, using a spatula, until fully combined and airy.
- Spoon the filling over the chilled crusts, smoothing the tops with a spatula for a clean finish.
- Cover the tray with plastic wrap and refrigerate for at least 2 hours, or until the cheesecakes are set and firm to the touch.
- Once set, decorate the mini cheesecakes with fresh berries or your favorite toppings just before serving for a splash of color and flavor.
- Serve these creamy, tangy treats chilled, and enjoy the perfect bite-sized indulgence that’s quick to make and irresistibly satisfying.
Pro tips for perfect mini cheesecakes
- Bolded mini-head: Chill the crust thoroughly before adding the filling to prevent it from becoming soggy.
- Bolded mini-head: Whip the cream just until soft peaks form—over-whipping can make it grainy and difficult to fold in.
- Bolded mini-head: Use room temperature cream cheese to avoid lumps and ensure a silky, smooth filling.
- Bolded mini-head: Gently fold the whipped cream into the cream cheese mixture to keep the filling light and airy.
- Bolded mini-head: Chill the assembled cheesecakes for at least 2 hours, or until set and slightly firm to the touch.
- Bolded mini-head: For a glossy finish, briefly warm the topping slightly or add a delicate drizzle just before serving.
- Bolded mini-head: When pressing the crust down, use the bottom of a small glass or measuring cup for an even, compact base.
Common mistakes and how to fix them
- FORGOT to chill crust? Chill for 10 minutes to set properly.
- DUMPED filling too quickly? Fold in whipped cream gently to maintain fluffiness.
- OVER-TORCHED crust? Remove early and check with a light golden color.
- MISSED sensory cues? Look for slight jiggle and a firm crust to know it’s ready.
Quick Fixes and Pantry Swaps
- When the crust is too soft, splash it with a little more melted butter and press again.
- If the filling cracks when set, patch with a dollop of whipped cream and smooth over.
- Dumped the filling too quickly? Fold in whipped cream gently to maintain fluffiness.
- Over-torched crust? Remove early and check with a light golden color.
- Splash a touch of lemon juice if the filling tastes dull or flat.
Prep, store, and reheat tips
- Prepare the crust and filling up to a day in advance; keep refrigerated to prevent moisture loss, which can affect texture and flavor.
- Store the assembled cheesecakes covered in plastic wrap in the fridge for up to 2 days; the flavors deepen slightly, and they stay creamy.
- Shelf life is best within 48 hours for optimal freshness—after that, the texture may soften and flavors fade.
- Reheat briefly in the fridge or serve cold; if needed, let sit at room temperature for 5 minutes for a softer bite, with a slightly richer aroma.
Top questions about mini cheesecakes
1. Can I use low-fat cream cheese?
Yes, using full-fat cream cheese gives the best creamy texture and tang. Light versions tend to be less rich and may alter the final consistency.
2. Can I make these vegan?
Absolutely. You can substitute dairy-free cream cheese or even mashed silken tofu for a lighter, vegan-friendly filling. Keep in mind it might change the tang and creaminess slightly.
3. How long should I chill the cheesecakes?
Chilling for at least 2 hours is key. This allows the filling to firm up and the flavors to meld, giving you a smooth, set cheesecake with a slight wobble.
4. Can I make these in advance?
Yes, you can prepare the crust and filling ahead. Keep the crust in the fridge for up to a day and the assembled cheesecakes for 1-2 days, covered tightly.
5. How do I decorate the cheesecakes?
Use fresh berries or fruit for toppings. If using jam, warm it slightly to loosen and drizzle over just before serving for a shiny, vibrant look.
6. My filling cracked, what do I do?
If the filling cracks, gently smooth it over with a small spatula or add a dollop of whipped cream to hide imperfections.
7. How do I ensure a smooth filling?
Make sure the cream cheese and heavy cream are at room temperature for smooth mixing. Cold ingredients can cause lumps and uneven texture.
8. Can I change the crust ingredients?
Use crushed digestive biscuits or graham crackers for a richer, more buttery base. If you prefer a lighter crust, try vanilla wafers or cookies.
9. Can I flavor the cheesecake?
Yes, you can add flavors like vanilla extract, lemon zest, or even a splash of liqueur to customize the filling to your taste.
10. Should I serve them cold or at room temperature?
Serve these mini cheesecakes cold straight from the fridge. Letting them sit at room temp for 5 minutes enhances the aroma and softens the texture slightly.
These no-bake mini cheesecakes are a tiny, creamy escape that fit into any busy moment. Sometimes, it’s the simple things—like a cool, tangy bite—that make a day feel a little brighter. No matter the season, they’re a small treat that’s easy to love and even easier to whip up. Enjoy the quiet pleasure of each little spoonful, and let them be a reminder that sometimes, less really is more.
When the fridge is full of these small delights, I find myself reaching for one without hesitation, savoring that moment of cool, smooth sweetness. It’s funny how such a simple recipe can bring a little extra joy, especially when life feels a bit hectic.

Hi, I’m Madison Lane, the cook, recipe creator, and heart behind this kitchen. Food has been part of my life for as long as I can remember. Some of my earliest memories are of standing beside my dad while he cooked, watching him move comfortably around the kitchen, tasting sauces, and explaining why patience mattered just as much as seasoning.
