There’s something about these no bake chocolate almond bars that feels like a secret tucked in the fridge, waiting to be discovered. Maybe it’s the crunch of toasted almonds paired with the rich, smooth chocolate that makes you pause. Or it’s that quick, no-fuss process that turns pantry ingredients into a little moment of indulgence, no oven needed.
I started making these when I needed a break from complicated desserts, and honestly, they became my go-to for last-minute cravings. The best part? You get this satisfying bite of chocolate-y sweetness with a hint of almond, all in a texture that’s both firm and just a little chewy. It’s the kind of treat that’s perfect for sharing—or not sharing, if you’re really into it.
And now, whenever I spot a bag of almonds or a block of good dark chocolate, I think about how easy it is to whip up something that feels indulgent but doesn’t demand much time. It’s honest, simple comfort, wrapped in a shiny chocolate coat. That’s what makes these bars more than just a snack—they’re a little moment of calm in a busy day.
This recipe is inspired by childhood memories of sneaking into the kitchen late at night, craving something sweet and crunchy. It’s about creating a treat that’s simple enough for a busy life but packed with nostalgic comfort. The no-bake aspect makes it perfect for those moments when you need a quick fix without turning on the oven or fussing over complicated steps.
The story behind this recipe
- This recipe came together on a rainy afternoon when I was rummaging through my pantry, looking for something quick and satisfying. I was tired of the usual baked desserts and wanted something that wouldn’t heat up the kitchen or demand a lot of fuss. The idea of combining crunchy almonds with smooth, rich chocolate just clicked, and I realized it could be a perfect no-bake treat for busy days or lazy weekends.
- It’s a recipe born from the chaos of everyday life—an impulse fix that’s easy to throw together and always hits the sweet spot. Over the years, I’ve handed these bars to friends at gatherings, tucked them into lunchboxes, and kept several in the freezer for emergency chocolate cravings. Each batch feels like a little act of comfort, a small victory in simplicity.
- heading
- story_type
Ingredient breakdown
- Dark chocolate: I love a good 70-85% cocoa bar, it melts smoothly and has that deep, slightly bitter punch. Swap with milk chocolate if you want milder sweetness, but the flavor won’t be as rich.
- Almonds: Toasted almonds bring that irresistible crunch and nutty aroma—make sure to lightly toast them for extra flavor. If you’re allergic or out, chopped hazelnuts or pecans work well too.
- Butter: I use unsalted here to control the salt level, and it gives the chocolate a glossy, velvety finish. Coconut oil can be a good dairy-free alternative, but it adds a subtle coconut scent.
- Sweetener: Just a touch of honey or maple syrup helps balance the bitterness of the chocolate and enhances the nutty notes. Skip if you prefer a less sweet bar, but it might feel a tad drier.
- Vanilla extract: It rounds out the flavors and adds a warm, inviting aroma. A splash of almond extract can boost the nuttiness if you’re into that, but use sparingly.
- Salt: A pinch of sea salt elevates all the flavors and keeps the sweetness from feeling cloying. Try smoked sea salt for a smoky twist, if you’re feeling adventurous.
Spotlight on key ingredients
Dark chocolate:
- I love a good 70-85% cocoa bar, it melts smoothly and has that deep, slightly bitter punch. Swap with milk chocolate if you want milder sweetness, but the flavor won’t be as rich.
- Almonds: Toasted almonds bring that irresistible crunch and nutty aroma—make sure to lightly toast them for extra flavor. If you’re allergic or out, chopped hazelnuts or pecans work well too.
Almonds:
- Toasted almonds bring that irresistible crunch and nutty aroma—make sure to lightly toast them for extra flavor. If you’re allergic or out, chopped hazelnuts or pecans work well too.
- ingredient
Notes for ingredient swaps
- Dairy-Free: Swap regular butter for coconut oil or vegan butter. It won’t set quite the same but still delicious.
- Chocolate: Use milk or white chocolate if you prefer a sweeter, milder flavor. Keep in mind, the texture might be softer.
- Sweetener: Maple syrup or agave can replace honey for a vegan-friendly, slightly different sweetness profile.
- Nuts: Cashews or pumpkin seeds can replace almonds—try toasted for extra crunch and flavor, but expect a different nutty aroma.
- Salt: Sea salt is best, but smoked salt adds a subtle smoky depth. Use sparingly to avoid overpowering the chocolate.
- Add-ins: Dried fruit or coconut flakes can be stirred in for extra texture and flavor—use sparingly so they don’t overwhelm.
Equipment & Tools
- 20x20cm (8×8 inch) pan: Holds the mixture and shapes the bars.
- Microwave-safe bowl: Melts the chocolate and butter smoothly.
- Spatula: Stirs and spreads the mixture evenly.
- Sharp knife: Cuts the set chocolate into bars.
- Parchment paper: Prevents sticking and simplifies removal.
Step-by-step guide to no bake bars
- Gather your equipment: a 20x20cm (8×8 inch) square pan, a heatproof spatula, a sharp knife, and parchment paper. Line the pan with parchment for easy removal.
- In a microwave-safe bowl, combine 200g (7 oz) dark chocolate and 2 tbsp unsalted butter. Microwave in 30-second bursts, stirring after each, until smooth and glossy. This takes about 1-2 minutes total. Smell that rich, cocoa aroma as it melts.
- While the chocolate melts, roughly chop 1 cup toasted almonds. Toast almonds beforehand if not already toasted—they should smell nutty and fragrant, and be lightly golden.
- Pour the chopped almonds into the melted chocolate mixture. Stir well to coat all the nuts evenly. The mixture should be thick but still pourable; if it’s too stiff, warm slightly more.
- Transfer the mixture into your prepared pan. Use a spatula to spread it evenly, pressing down gently to flatten the surface. You want a smooth, level top with no gaps or air pockets.
- Place the pan in the fridge for at least 2 hours to set. The chocolate will firm up, and the flavors will meld. If you’re in a rush, the freezer speeds this up—about 30-45 minutes should do it.
- Once set, remove from the fridge. Carefully lift the block out using the parchment paper. Use a sharp knife to cut into 12 bars, aiming for clean, straight lines. Wipe the knife between cuts for neat edges.
- Let the bars rest at room temperature for 5 minutes before serving. This softens the chocolate slightly, making each bite more satisfying. For a more polished look, drizzle with a little extra melted chocolate if desired.
Chill the assembled bars in the fridge for at least 2 hours, or until firm. Before serving, let them sit at room temperature for 5 minutes for optimal softening and flavor release. Plate with a sprinkle of sea salt or extra almonds for presentation.
How to Know It’s Done
- Chocolate is glossy and fully melted without lumps.
- Nuts are evenly coated and fragrant after mixing.
- Bars are firm and set after chilling, with no sticky or soft spots.
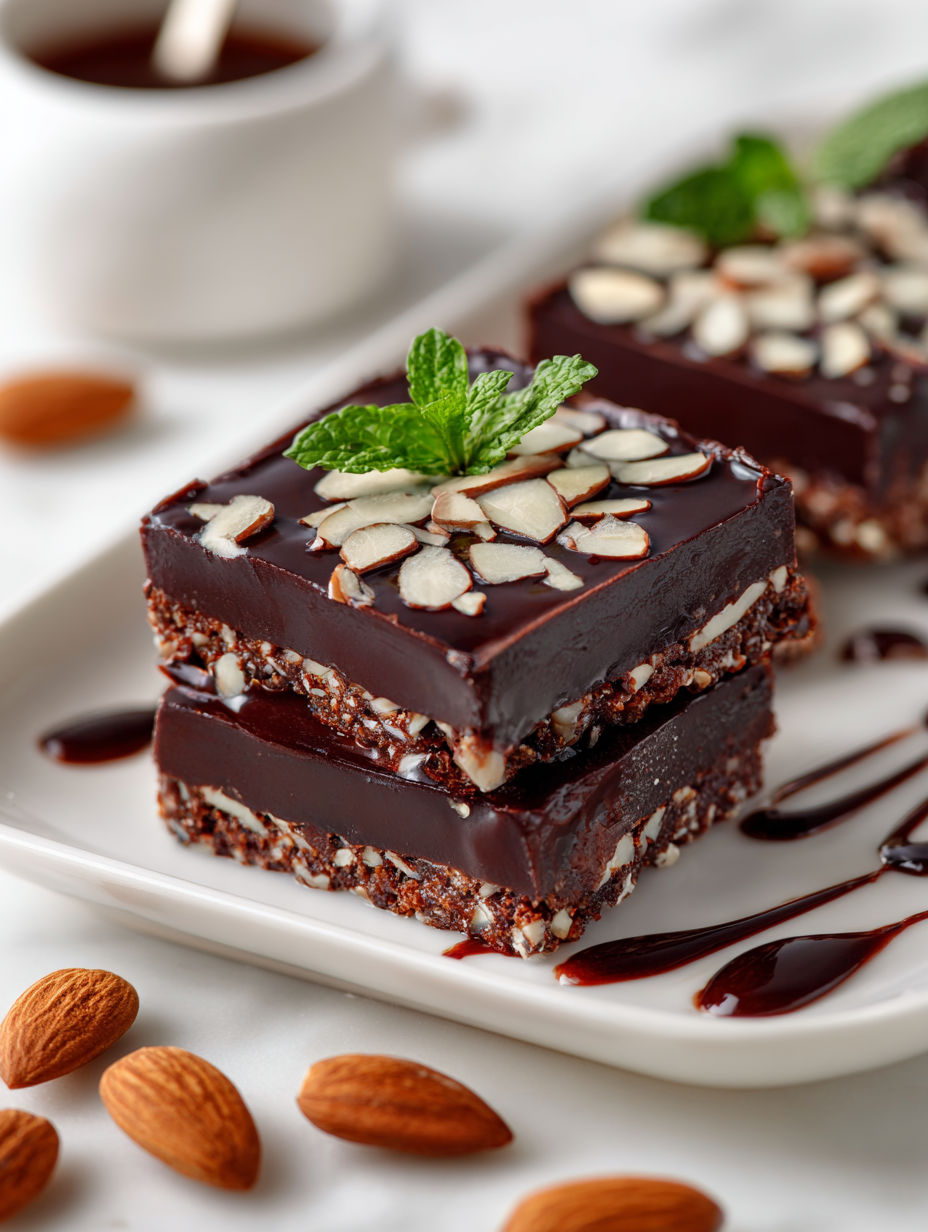
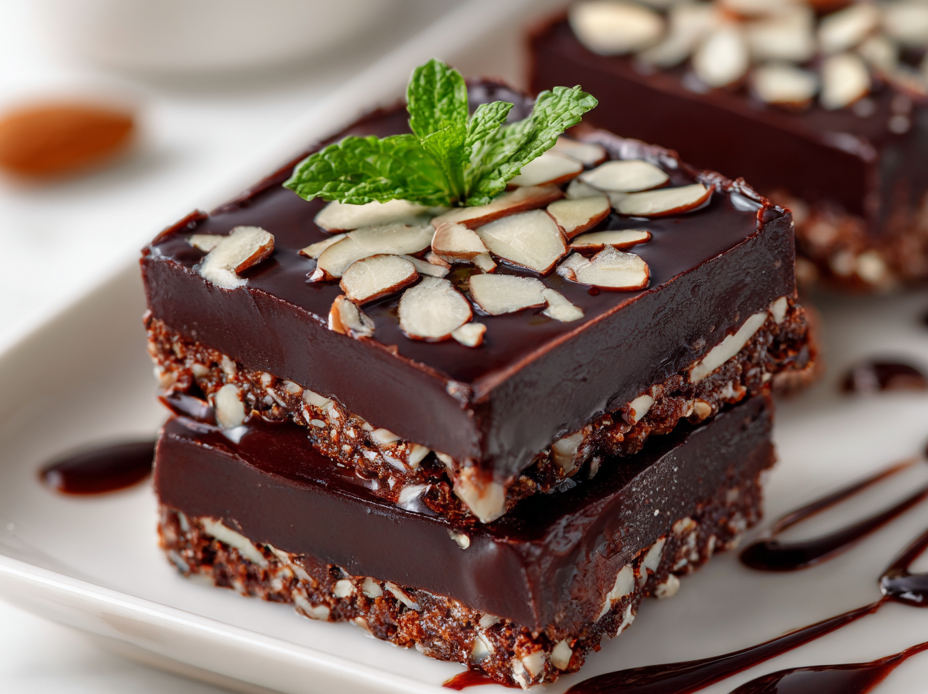
No-Bake Chocolate Almond Bars
Ingredients
Equipment
Method
- Line your 20x20cm (8x8 inch) pan with parchment paper, leaving some overhang for easy removal.
- In a microwave-safe bowl, combine the dark chocolate and butter. Microwave in 30-second bursts, stirring after each, until the mixture is smooth and glossy with a rich cocoa aroma. This should take about 1-2 minutes in total.
- While the chocolate melts, roughly chop the toasted almonds—they should smell nutty and fragrant, with a light golden hue.
- Pour the chopped almonds into the melted chocolate mixture and stir thoroughly to coat all the nuts evenly. The mixture will become thick but still pourable; if needed, warm it slightly more to loosen it up.
- Transfer the mixture into your prepared pan. Use a spatula to spread it evenly, pressing down gently to create a smooth, level surface. This helps compact the mixture and remove air bubbles.
- Sprinkle a pinch of sea salt and a drizzle of honey or maple syrup if desired, then press lightly to embed the toppings. Place the pan in the fridge for at least 2 hours to allow the chocolate to set completely.
- Once fully set and firm, lift the block out of the pan using the parchment overhang. Use a sharp knife to cut into 12 bars, wiping the knife between slices for clean edges.
- Let the bars sit at room temperature for 5 minutes before serving. This softens the chocolate slightly, making each bite more satisfying. Enjoy your homemade no-bake chocolate almond bars!
Notes
Pro Tips for Perfect Bars
- Use high-quality chocolate for a richer, smoother melt that coats the palate.
- Toast almonds until fragrant and golden to boost flavor and crunch.
- Melt chocolate in short bursts, stirring thoroughly to prevent burning and ensure glossy texture.
- Press mixture firmly into the pan to eliminate air pockets and create even bars.
- Chill thoroughly—at least 2 hours—to achieve clean cuts and a firm bite.
- Wipe your knife between cuts for neat, smooth edges and prevent sticking.
- Let the bars sit at room temp for 5 minutes before serving to soften slightly and enhance flavor.
Common mistakes and how to fix them
- FORGOT to measure ingredients precisely → Use a scale for accuracy, ensuring consistent texture.
- DUMPED melted chocolate too quickly → Pour gradually and stir constantly for smooth melting.
- OVER-TORCHED the chocolate → Remove from heat immediately once melted to prevent burning and bitterness.
- MISSED chilling time → Allow bars to set fully in the fridge for clean cuts and proper texture.
Quick fixes and pantry swaps
- When chocolate seizes, splash in a teaspoon of hot water to loosen it.
- If mixture is too dry, add a tiny drizzle of melted coconut oil for shine.
- DUMPED nuts too oily? Toast them longer or pat dry before mixing.
- When bars crack during cutting, slightly warm your knife for cleaner slices.
- Splash a pinch of sea salt on finished bars for a quick flavor boost.
Prep, store, and reheat tips
- Preparing the mixture a day ahead allows the flavors to meld and the chocolate to develop a richer taste. Keep it covered in the fridge, and it will be ready to set when you want to serve.
- Store the finished bars in an airtight container at room temperature for up to 3 days, or refrigerate for up to 1 week. The chocolate stays firm and glossy, with a satisfying snap.
- For longer storage, freeze the bars wrapped tightly in plastic wrap and then in foil. They’ll last up to 3 months, with the chocolate remaining smooth and not overly hardened.
- Reheating isn’t necessary; if you want a softer bite, let the bars sit at room temperature for 5-10 minutes. The chocolate will soften slightly, enhancing the flavor and texture.
Top questions about no bake bars
1. Can I use different chocolate types?
Use high-quality dark chocolate for the best flavor and smooth melt. Look for 70-85% cacao bars.
2. Can I swap the dark chocolate?
Yes, milk or white chocolate can be substituted for a sweeter, milder taste, but expect a softer set.
3. What if I don’t have almonds?
Almonds bring crunch and nuttiness, but you can replace them with chopped hazelnuts or pecans for different flavor profiles.
4. How do I know when they’re ready?
Chill the mixture in the fridge for at least 2 hours until firm. The chocolate should be glossy and set, not sticky.
5. My mixture is too thick—what now?
If the mixture is too stiff to spread, warm it slightly in the microwave for 10-15 seconds and stir well.
6. Why are my bars cracking when I cut them?
Use a sharp knife wiped clean between cuts for neat, clean bars. Warming the knife helps avoid cracking.
7. How should I store leftovers?
Store in an airtight container at room temp for up to 3 days, or freeze for longer storage. Reheat slightly if needed.
8. Can I add salt or other toppings?
Adding a pinch of sea salt on top enhances flavor and balances the sweetness. Smoked salt adds a smoky touch.
9. Are there vegan options?
To make vegan, substitute butter with coconut oil and choose vegan chocolate. The texture remains rich but slightly softer.
10. Can I customize the ingredients?
For extra flavor, stir in dried fruit or coconut flakes before setting. Use sparingly so they don’t overwhelm the chocolate.
These no bake chocolate almond bars are more than just a sweet treat; they’re a quick reminder that simplicity can be deeply satisfying. The rich chocolate paired with crunchy almonds makes for a snack that’s both nostalgic and indulgent, perfect for any moment you need a little comfort.
Whenever I make a batch, I’m reminded of how small, honest pleasures like this can turn an ordinary day into something a bit more special. No matter how busy life gets, these bars are a simple, reliable way to sneak in a moment of sweetness and calm.

Hi, I’m Madison Lane, the cook, recipe creator, and heart behind this kitchen. Food has been part of my life for as long as I can remember. Some of my earliest memories are of standing beside my dad while he cooked, watching him move comfortably around the kitchen, tasting sauces, and explaining why patience mattered just as much as seasoning.
