Most people think of chocolate truffles as sweet, rich bites, but I love tossing in a pinch of sea salt or a crack of chili flakes. It’s a little unexpected, and it makes each bite more interesting—like a secret you keep from everyone else at the party. No bake means less fuss, more flavor, and honestly, it’s a good way to get that complex, layered taste without turning on the stove.
This recipe came about during a chaotic weekend when I wanted something indulgent but didn’t want to spend hours in the kitchen. The savory twist sparked from a craving for something that hits all the right notes—sweet, salty, a hint spicy—and still feels fancy enough to serve at a small gathering or just to keep around for yourself. It’s simple, honest, and a little rebellious in the best way.
I find that the unexpected salt or chili in these truffles transforms the typical into something memorable. It’s like a little surprise with each bite, stirring up the kind of joy that comes from breaking rules—just a bit. Plus, the no-bake part keeps the process straightforward, so you can focus on the flavors and textures that make these truffles stand out.
Focusing on the unexpected use of savory ingredients like sea salt or chili flakes in traditional chocolate truffles to create a complex flavor profile that surprises the palate.
Surprising savory twists
- I love how a pinch of sea salt in these truffles cuts through the richness and amplifies the chocolate flavor, reminding me of a well-balanced dessert I had in a tiny Parisian cafe.
- Making these no-bake truffles has become my go-to when I need a quick fix of comfort—there’s something deeply satisfying about mixing, rolling, and chilling without any heat involved.
- Every time I dip into these truffles, I remember the chaos of holiday baking, but these kept me grounded—simple, no fuss, just pure chocolate bliss.
- The first time I added chili flakes by accident, I was surprised at how it awakened the deep cocoa notes—now I can’t imagine them without that tiny kick.
- Sharing these with friends always sparks a little joy—watching their faces light up when biting into that smooth, velvety chocolate with a hint of salt makes me proud.
The story behind this recipe
- This recipe was born out of a quiet afternoon experiment when I realized how forgiving and flexible no-bake treats can be. I wanted something that felt rich and decadent but didn’t require turning on the oven or fussing over tempering chocolate. The idea of adding a little salt and chili flakes came from craving that perfect balance of sweet and savory, something a bit unexpected but utterly satisfying.
- One day, I was rummaging through my pantry, searching for a quick dessert to impress friends who showed up unannounced. I threw together bits of chocolate, butter, and a dash of sea salt, and the result was a little revelation. It’s funny how simplicity like this can turn into a go-to, especially when you want something homemade but don’t have hours to spare.
- heading
- Story behind this recipe
Trivia and Cultural Roots
- Some believe chocolate truffles originated in France, where the rich, velvety texture mimics the look of the truffle mushroom for which they are named.
- During wartime rationing, resourceful cooks created no-bake versions using simple pantry ingredients, making these treats a symbol of resilience and improvisation.
- In many cultures, adding a pinch of sea salt to sweets like chocolates has been a tradition to heighten flavor complexity, long before it became trendy.
Ingredient breakdown: key components
- Dark chocolate: I prefer a high cocoa content, around 70%, for that deep, bitter richness that melts smoothly on the tongue. If you like it sweeter, go for 60%, but don’t skip the quality—it makes all the difference.
- Butter: I use unsalted, preferably European-style for a touch more creaminess. Cold butter can cause the mixture to seize up, so soften it slightly before mixing—your truffles will be velvety and glossy.
- Cocoa powder: Opt for natural, unsweetened cocoa powder. It’s vibrant and sharp, adding depth. If you only have Dutch-processed, expect a mellower, smoother taste, but the flavor will be a little softer.
- Sea salt: Just a pinch really wakes up the chocolate. I like flaky sea salt for texture, but fine sea salt works fine too. Be careful not to overdo it—salty bites should surprise, not overpower.
- Chili flakes: Optional but transformative. Use a small pinch, or more if you’re feeling brave. It adds a smoky, spicy kick that contrasts beautifully with the sweetness—think dark, velvety with a hint of heat.
- Sweetener (optional): I usually stick to just the chocolate and butter, but if you want a touch more sweetness, a teaspoon of honey or maple syrup can round out the flavors without making it overly sweet.
- Vanilla extract: A splash (about ½ teaspoon) enhances the chocolate’s richness and adds warmth. Skip it if you want a purer, more intense cocoa flavor—your call.
Spotlight on key ingredients
Sea salt:
- Dark chocolate: I prefer a high cocoa content, around 70%, for that deep, bitter richness that melts smoothly on the tongue. If you like it sweeter, go for 60%, but don’t skip the quality—it makes all the difference.
- Cocoa powder: Opt for natural, unsweetened cocoa powder. It’s vibrant and sharp, adding depth. If you only have Dutch-processed, expect a mellower, smoother taste, but the flavor will be a little softer.
- Just a pinch really wakes up the chocolate. I like flaky sea salt for texture, but fine sea salt works fine too. Be careful not to overdo it—salty bites should surprise, not overpower.
Dark chocolate:
- I love how it’s velvety and melts into a rich, bittersweet pool. During melting, it becomes glossy and smooth, almost like liquid velvet, which makes shaping easy.
- Cocoa powder: It’s the punch of deep chocolate flavor that intensifies with heat, releasing a smoky, slightly acidic aroma. During mixing, it thickens quickly and gives that matte finish that’s a telltale sign of good quality cocoa.
Notes for ingredient swaps
- Dairy-Free: Swap regular butter for coconut oil or dairy-free margarine. Expect a slightly different richness and texture, but still creamy and satisfying.
- Vegan: Use vegan dark chocolate and coconut oil instead of butter. The flavor stays rich, but the mouthfeel is a touch silkier and coconutty.
- Sugar-Free: Substitute with a sugar-free dark chocolate and a dash of erythritol or stevia. Watch for slight cooling effects or aftertaste, depending on your sweetener.
- Nut-Free: Omit nuts or use toasted sunflower seeds or pumpkin seeds for crunch. Keep an eye on allergen safety and texture contrast.
- Spice Variations: Replace chili flakes with smoked paprika or a pinch of cinnamon for a different spicy or smoky kick. Adjust to taste, but remember, less is more.
- Salt: Use flavored sea salts like smoked or fleur de sel for an extra layer of complexity. Be cautious; too much salt can overpower the chocolate.
Equipment & Tools
- Heatproof bowl: For melting chocolate evenly over simmering water.
- Saucepan: To create a bain-marie for gentle melting.
- Spatula: To stir and fold ingredients smoothly.
- Parchment paper: Prevents sticking and makes cleanup easier.
- Spoon or melon baller: For scooping and shaping the truffles.
- Refrigerator: To chill and set the chocolate mixture and formed truffles.
Step-by-step guide to no bake truffles
- Gather your equipment: a mixing bowl, a spatula, a baking sheet, and parchment paper. The bowl is for melting and mixing, spatula for folding, sheet for chilling, and parchment to prevent sticking.
- Chop the chocolate: roughly cut 200g of dark chocolate into small pieces. Smaller pieces melt faster and more evenly. Use a serrated knife for clean cuts.
- Melt the chocolate: place the chopped chocolate in a heatproof bowl. Set over a pot of simmering water (bain-marie) at about 45°C / 113°F. Stir gently until smooth. (a) If you don’t have a double boiler, microwave in 20-second bursts, stirring in between. (b) Be careful not to overheat or burn the chocolate.
- Add butter: once the chocolate is melted and smooth, stir in 2 tablespoons of unsalted butter. It should incorporate fully and give a glossy sheen. If it looks streaky, gently heat a little more or stir vigorously.
- Mix in flavorings: add ½ teaspoon vanilla extract, a pinch of sea salt, and a small pinch of chili flakes if using. Stir well to combine. Taste and adjust salt or spice if desired.
- Sift in cocoa powder: add 2 tablespoons of unsweetened cocoa powder. Fold in gently until fully blended. The mixture will thicken slightly but should be smooth and shiny.
- Chill the mixture: cover the bowl with plastic wrap. Place in the fridge for 30–45 minutes until firm enough to scoop but still soft enough to roll.
- Form the truffles: using a teaspoon or melon baller, scoop out small portions. Roll quickly between your palms into balls. Place on parchment-lined baking sheet.
- Chill again: refrigerate the formed truffles for at least 30 minutes to set completely. They should feel firm and have a slight sheen.
- Finish and serve: optional—roll in cocoa powder, chopped nuts, or shredded coconut for extra texture. Serve chilled or at room temperature for a softer bite.
Let the finished truffles rest in the fridge for at least 30 minutes before serving. For a prettier presentation, roll in cocoa powder or chopped nuts just before plating. Serve chilled for best texture and flavor.
How to Know It’s Done
- Chocolate mixture is glossy and smooth after melting.
- Truffles hold shape when rolled and are firm after chilling.
- Surface is matte but slightly shiny, indicating proper setting.
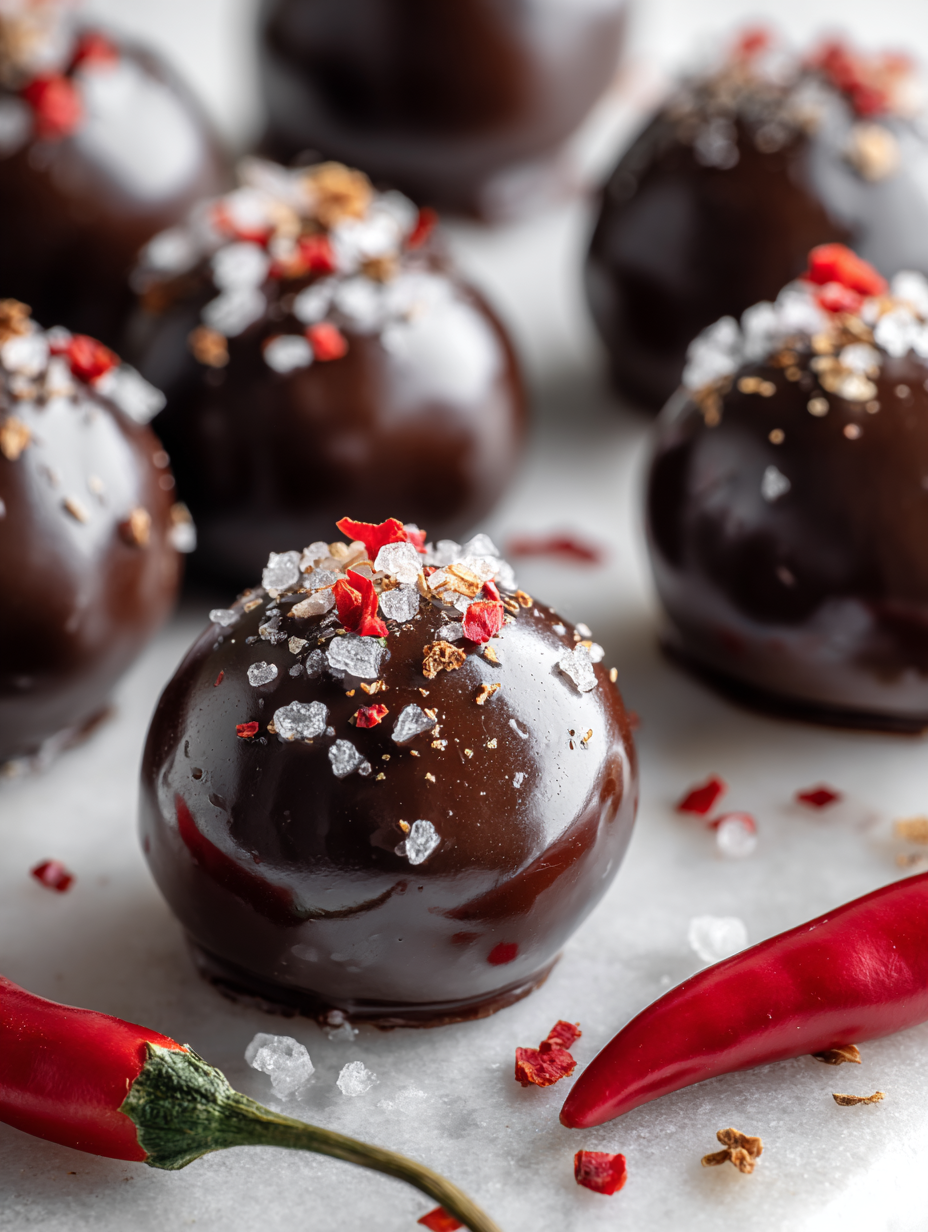
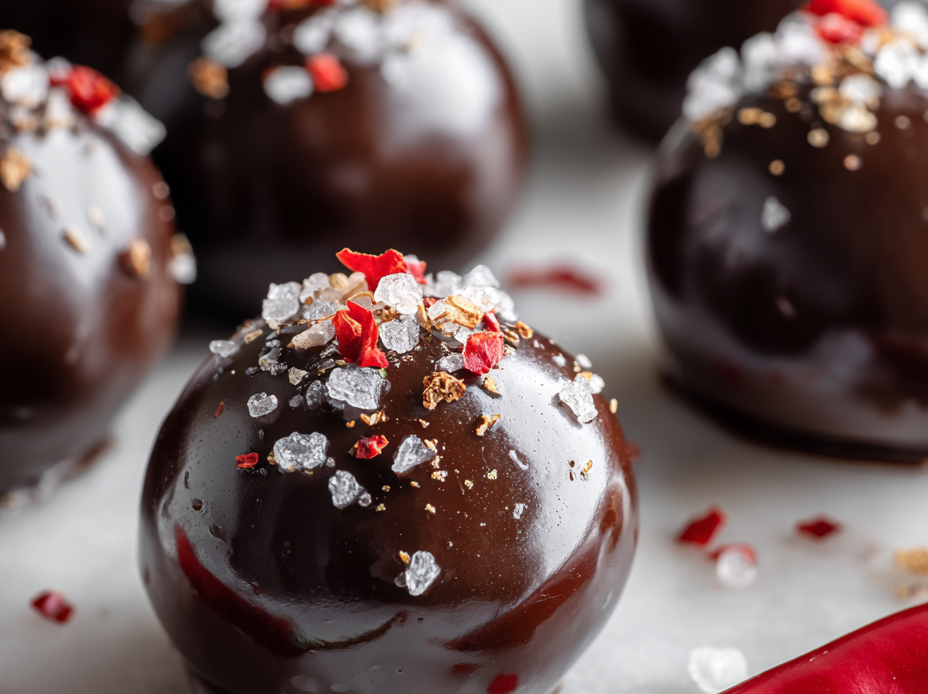
Savory Chili Sea Salt Chocolate Truffles
Ingredients
Equipment
Method
- Chop the dark chocolate into small, even pieces and place them in a heatproof bowl.
- Set the bowl over a saucepan with gently simmering water, creating a bain-marie, and stir until the chocolate melts completely, becoming glossy and smooth.
- Remove the bowl from heat, then stir in the softened butter until fully incorporated and the mixture gleams with a velvety texture.
- Sift in the cocoa powder and fold it into the chocolate mixture gently, maintaining a smooth, shiny consistency.
- Add the vanilla extract, sea salt, and chili flakes, stirring well to distribute the flavors evenly.
- Cover the bowl with plastic wrap and refrigerate for about 30-45 minutes until the mixture is firm enough to scoop and shape.
- Use a spoon or melon baller to scoop out small portions, then quickly roll each into smooth balls between your palms.
- Place the formed truffles on a parchment-lined tray and refrigerate for at least 30 minutes to set completely.
- Optional: Roll the chilled truffles in additional cocoa powder, chopped nuts, or shredded coconut for added texture and presentation.
- Serve the truffles chilled or at room temperature, enjoying the velvety texture with a surprising salty and spicy kick.
Notes
Pro tips for perfect truffles
- Melting: Use a double boiler or microwave in short bursts to keep the chocolate glossy and smooth.
- Folding: Gently fold in cocoa powder to avoid lumps and maintain a velvety texture.
- Chilling: Cool the mixture until just firm for easy scooping without becoming too hard to shape.
- Temperature: Keep water at a gentle simmer (around 45°C / 113°F) to melt chocolate without seizing.
- Spicing: Add chili flakes gradually, tasting as you go, for a balanced spicy kick that doesn’t overwhelm.
- Finishing: Roll in flaky sea salt or cocoa powder while slightly chilled for a professional look and flavor boost.
- Storage: Keep truffles refrigerated for up to a week or freeze for longer, letting them reach room temp before serving.
Common mistakes and how to fix them
- FORGOT to fold in cocoa powder thoroughly → gentle folding prevents lumps and keeps texture smooth.
- DUMPED hot water directly on chocolate → use a double boiler or microwave in short bursts to avoid seizing.
- OVER-TORCHED the chocolate → melt slowly over low heat or in short microwave bursts, stirring often.
- MISSED chilling time for shaping → refrigerate enough for the mixture to be firm but pliable, about 30 minutes.
Quick fixes and pantry swaps
- If mixture is too soft, chill for 10 more minutes to firm up.
- When chocolate seizes, add a teaspoon of vegetable oil and stir until smooth.
- Splash a bit of hot water if the chocolate isn’t melting evenly; stir gently.
- Patch over cracks by re-melting and re-shaping the truffles gently.
- Shield from humidity; store in airtight container to prevent blooming or sticking.
Prep, store, and reheat tips
- The chocolate mixture can be prepared up to 24 hours ahead; keep covered in the fridge to prevent absorbing fridge odors, which can dull the flavor and alter the aroma.
- Form the truffles and keep them on a parchment-lined tray in the fridge for up to 2 days before serving; they’ll stay firm but still melt-in-your-mouth fresh.
- Store finished truffles in an airtight container in the fridge for up to one week. For longer storage, freeze for up to 1 month; let them come to room temp for about 10 minutes before serving to regain their silky texture.
- Reheat or soften chilled truffles briefly at room temperature—about 5-10 minutes—until they’re slightly softer to bite, with a rich aroma and smooth surface. Avoid melting completely to maintain structure.
Top questions about no bake truffles
1. Can I substitute different types of chocolate?
Yes, you can use milk or white chocolate, but the flavor and texture will change, making them sweeter and a bit softer.
2. Can I make these vegan or dairy-free?
Absolutely, just ensure your substitute melts smoothly and maintains the structure. Coconut oil works well for a dairy-free option.
3. How long should I chill the mixture?
Chilling for at least 30 minutes helps the truffles set properly, but leaving them overnight enhances firmness and flavor meld.
4. How much salt should I add?
Adding a pinch more sea salt enhances flavor, but too much can overpower the chocolate. Use flaky sea salt for texture.
5. Does the quality of chocolate matter?
Using high-quality dark chocolate makes a noticeable difference—silky, rich, and melts beautifully in your mouth.
6. Can I coat the truffles with other toppings?
Yes, you can roll the truffles in cocoa powder, chopped nuts, or shredded coconut for added texture and flavor.
7. What if the mixture is too soft or too hard?
If your mixture is too sticky, pop it in the fridge for 15 minutes before shaping. Too firm? Let it sit at room temp for a few minutes.
8. How should I store leftover truffles?
Store these in an airtight container in the fridge for up to a week, or freeze for longer storage. Bring to room temp before serving.
9. What if my chocolate seizes?
If you overheat the chocolate, it can seize and become grainy. Re-melt with a teaspoon of vegetable oil to fix it.
10. Can I leave out the chili flakes?
Adding a small pinch of chili flakes is optional but adds a smoky, spicy kick that balances the sweetness beautifully.
Making these no bake chocolate truffles is a small act of rebellion against the usual. They’re rich, velvety, with that surprising hint of salt and spice that keeps you coming back for more. Sometimes, simple ingredients and a little tweak can turn a standard treat into something memorable.
In the end, it’s about those moments when you realize how satisfying it is to create something beautiful and delicious with your own hands—no fuss, just flavor. These truffles remind me that good things often come from trusting the process and embracing a bit of imperfection.

Hi, I’m Madison Lane, the cook, recipe creator, and heart behind this kitchen. Food has been part of my life for as long as I can remember. Some of my earliest memories are of standing beside my dad while he cooked, watching him move comfortably around the kitchen, tasting sauces, and explaining why patience mattered just as much as seasoning.
